![Untitled design (24)-1.png]](https://help.zenventory.com/hs-fs/hubfs/Logos/Untitled%20design%20(24)-1.png?width=60&height=60&name=Untitled%20design%20(24)-1.png)
Begin the video at 5:43, or jump to Chapter 3 for the portion covered in this article.
Before you start
This is Part 3, the final part of the Shopify + Zenventory setup process. You should have already completed Parts 1 and 2 before continuing. In this part, you'll build (or import) a Shopify Flow workflow that automatically routes eligible orders to Zenventory and submits fulfillment requests.
Set Up Shopify Flow to Send Orders to Zenventory
1. Install Shopify Flow app - if not installed yet
- About Shopify Flow https://help.shopify.com/en/manual/shopify-flow/getting-started/index?utm_source=sidekick
- App Page https://apps.shopify.com/flow
2. Create the workflow
- In Shopify admin, go to Apps → Flow.
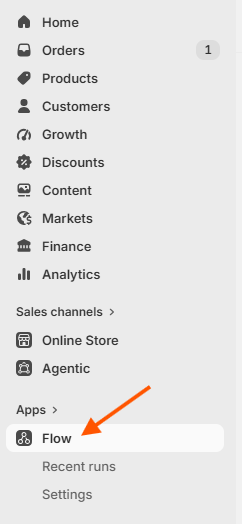
- Click Create workflow. Shopify’s workflow management instructions are available here: Shopify: Manage workflows in Shopify Flow

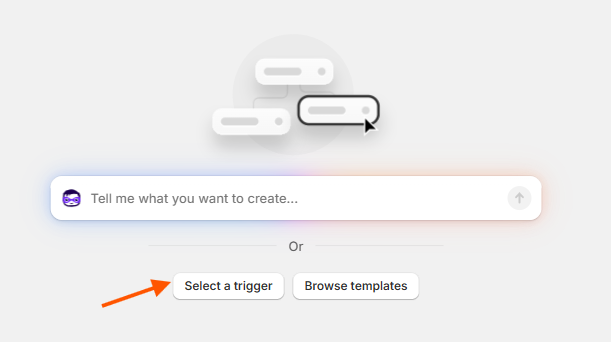
- Then choose “Select a trigger.”
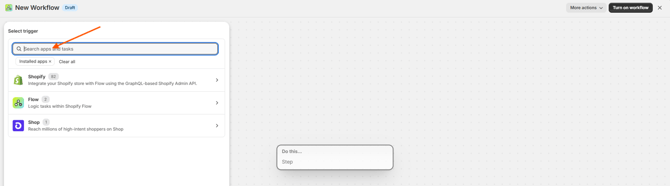
- Now in the workflow editor canvas, click in the Configuration Panel search field and type “Fulfillment Order Ready to Fulfill”, then select.
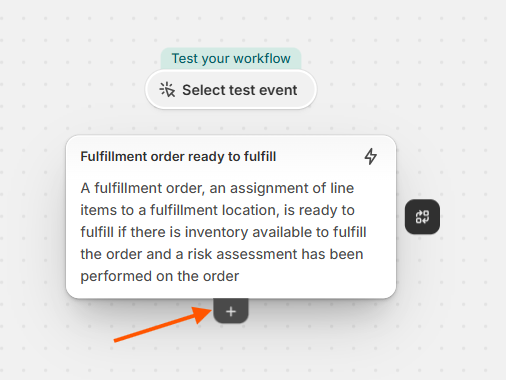
- Then hover over the trigger step in workflow editor canvas, then select the plus icon and choose “condition”.
- Next, in the Shopify Flow Configuration Panel click “Add a variable” button to open the Add a variable dialog.
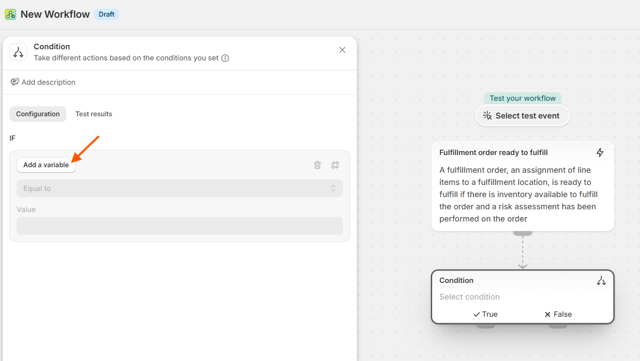
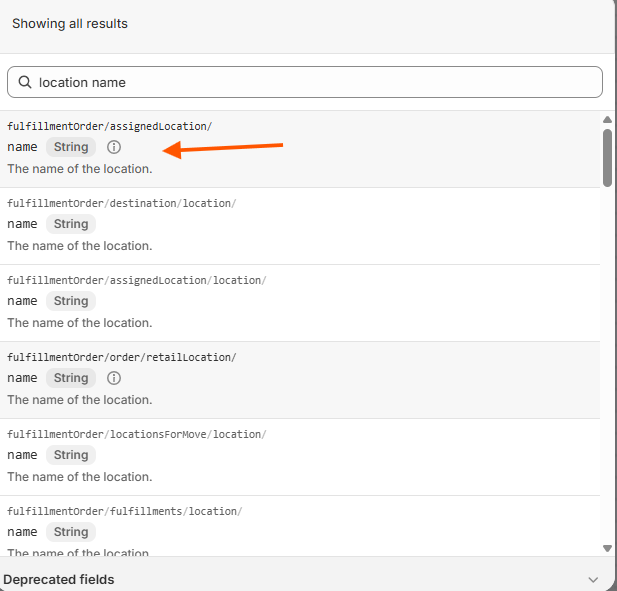
- Search in the Add a variable dialog pop up for “fulfillmentorder/assignedLocation/” (shown below) and select. This variable is the name of location.
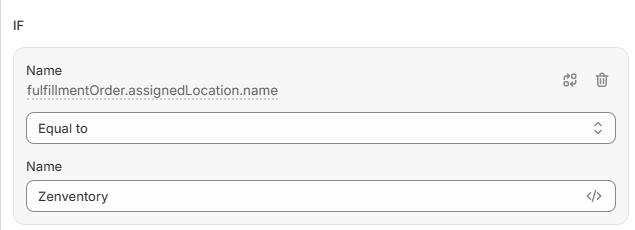
- Select the Condition Step to bring up it’s Configuration Panel. In there under IF, you should see that the Top field should already show “Equal to”. Type in the Name “Zenventory”
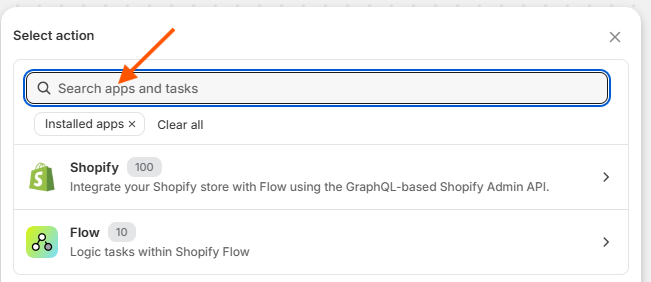
- In the workflow editor canvas hover back over the Condition Step and select the “+” icon under True and choose “Action”. In the Configuration Panel, search for “Submit fulfillment request” and select to create the Action Step True branch. This sends the request when the order is already assigned to Zenventory.
- Hover over the same Condition Step again and select the “+” icon under False and choose “Action”. In the Configuration Panel, search for “Move fulfillment Order” and select to create the False branch.
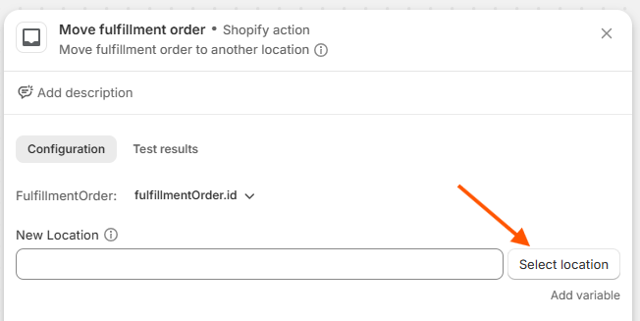
- Select the new Action Step of “Move Fulfillment Order” to pull up the Configuration Panel. Click the “Select Location” button.
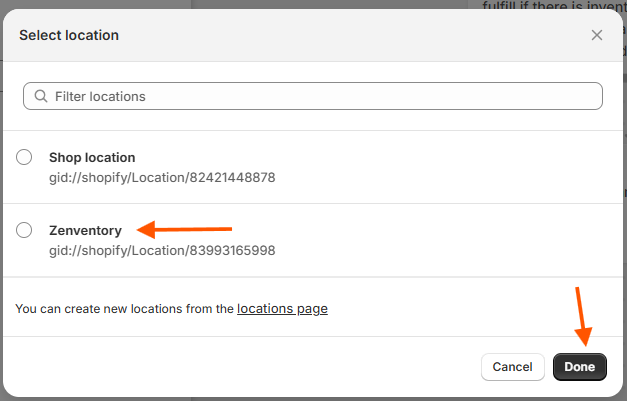
- In the Select location modal, choose Zenventory as the destination location and click done
- Hover over the Action Step of “Move Fulfillment Order”. Select the “+” icon underneath and select “Action”.
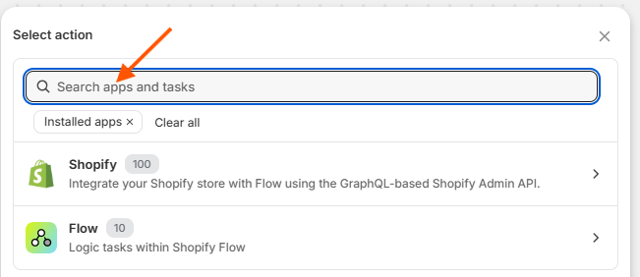
- In the Configuration Panel, search for “Submit fulfillment request” and select to create a new Action Step.
- Then hover over the trigger step in workflow editor canvas, then select the plus icon and choose “condition”.
- In the top right hand corner, click on the More actions dropdown menu, and select “Rename.” Name the workflow something clear, such as “Assign orders to Zenventory and submit fulfillment request”, or something that makes sense to you. Select the X to close out and only “Turn on workflow” when ready to use.
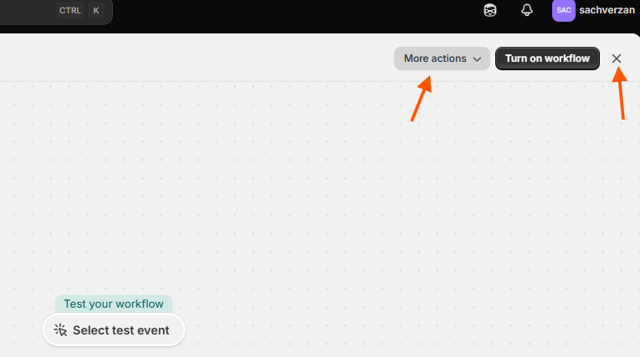
Diagram of Workflow
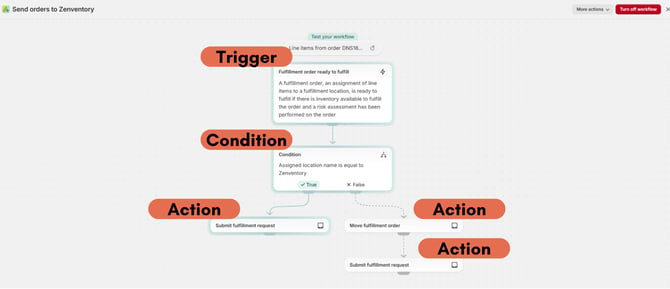
How the workflow works
When a fulfillment order is ready:
- If the items on the order are assigned to a location other than Zenventory, Shopify moves it to Zenventory and submits the fulfillment request.
- If the items on the order are already assigned to Zenventory, Shopify submits the fulfillment request without moving it.
- Zenventory can then receive the request and download the order through its normal sync process.
Send existing orders to Zenventory
Orders created before Zenventory was connected that still need to be fulfilled, will have to be requested for fulfillment manually.
- Go to Orders in Shopify admin.
- Select the orders that Zenventory needs to fulfill.
- Click the … menu at the bottom of the order list.
- Select Change fulfillment location.
- Choose Zenventory, then click Change location. Shopify explains how fulfillment locations can be changed from an order here:
Shopify: Fulfilling orders using a fulfillment service - Keep the same orders selected.
- Click the … menu again.
- Select Request fulfillment. This allows the connected fulfillment service to receive and process the request.
Shopify: Fulfilling orders using a fulfillment service
Zenventory should download the orders during its next automatic sync.
Test the automation
Before relying on the workflow for all orders, place or use a test order and confirm that:
- The fulfillment order is assigned to Zenventory.
- A fulfillment request is submitted.
- The order appears in Zenventory.
- Fulfillment and tracking information return to Shopify.
If you are distributing this setup to another store, you can include the exported .flow file with this article. The file can be imported from Apps → Flow → Import, but the Zenventory location should be reviewed and selected again if necessary.
Skip Manual Flow Setup by Importing the Workflow File
Instead of creating the Zenventory workflow step by step, you can import the completed Shopify Flow file.
You’ll still need the Shopify Flow app installed and the Zenventory connection completed. The file skips the manual workflow-building process.
- Reach out to Zenventory Support to request the .flow file.
- In Shopify admin, go to Apps → Flow.
- Click Import. Shopify: Import a workflow
- Click Add files, then select the downloaded .flow file. You can also drag the file into the import window.
- Optional: Click Preview workflows to review the workflow before importing it.
- Click Import.
- Open the imported workflow and click the Move Fulfillment Order action. Click the Select Location button and make sure Zenventory is the selection and hit Done.
- Confirm that the workflow includes:
- Trigger: Fulfillment order ready to fulfill
- Condition: Location name is equal to Zenventory
- True action: Submit fulfillment request
- False action: Move fulfillment order to Zenventory location
- Action: Submit fulfillment request
- Save and activate the workflow when you’re ready. Shopify: Manage workflows in Shopify Flow
- Place or use a test order to confirm that Shopify assigns the order to Zenventory and sends the fulfillment request successfully.
Important: Importing the file replaces the need to manually create the trigger, condition, and actions. It does not install Zenventory, connect the app, create the Zenventory location, or configure inventory settings.
Troubleshooting
Workflow isn't triggering on new orders?
Check that you clicked "Turn on workflow." It's easy to close out of the editor after building it and forget this last step.
Fulfillment request never gets submitted?
The Condition step's location name likely doesn't match exactly. Check for a typo, extra space, or wrong variable selected under "fulfillmentorder/assignedLocation."
Imported .flow file's Move Fulfillment Order action shows no location selected?
Location references don't carry over between Shopify accounts on import. Reselect Zenventory in that action, as noted at the end of the import section.
Older orders never show up in Zenventory even after the workflow is on?
The workflow only applies to new fulfillment orders going forward. Existing orders need the manual "Change fulfillment location" and "Request fulfillment" steps described above.