![Untitled design (24)-1.png]](https://help.zenventory.com/hs-fs/hubfs/Logos/Untitled%20design%20(24)-1.png?width=60&height=60&name=Untitled%20design%20(24)-1.png)
Updated as of 6/7/2024 - for UPS Account setup, please see that article - here.
There are three ways to mark orders as shipped in Zenventory, and the method for adding a carrier/service is different for each use case. See the instructions below for the scenario that applies to you.
- Create a carrier/service for use with Zenventory's in-app shipping system (generating labels in Zenventory)
- Create a carrier/service for marking orders as externally shipped (generating labels in a 3rd party shipping system that is not integrated to Zenventory)
- If you're shipping in a 3rd party integrated shipping system such as ShipStation, there is no need to create carriers & services manually. These should be created automatically upon initializing the integration.
- NOTE: When creating a new carrier, the billing address state must be entered as the two character code, not the full state name. i.e. Washington will be entered as WA.
Linking a carrier & service for creating labels in Zenventory
NOTE: You will use your own Fedex, UPS, DHL ECommerce, Asendia, or Canada Post account numbers. For USPS, Zenventory has a built in Stamps.com account that will be used and your credit card of choice will be connected to the account, giving you the ability to load a dollar amount to be used during shipping. For more information on how to add funds take a look at this article. Add Funds for Use with Shipping
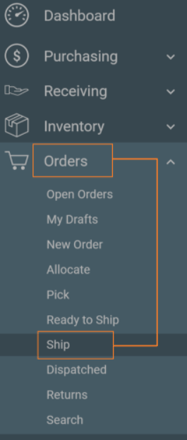
- Navigate to “Orders”, then “Ship”.
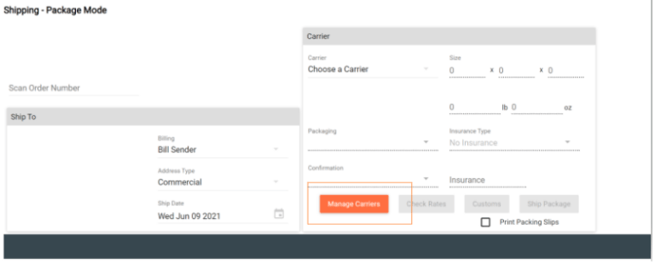
- Select “Manage Carriers”, then “Add Carrier”.
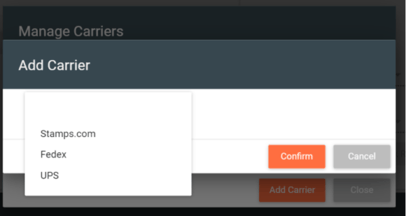
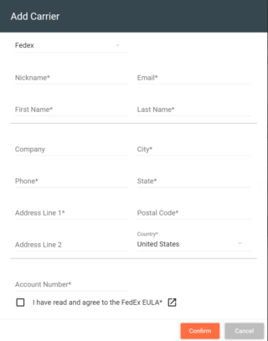
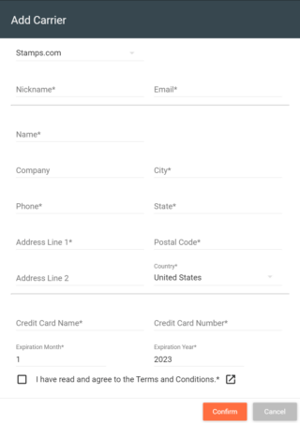
- The dropdown will give a list of carriers you can select. After the carrier has been selected, you will be prompted to fill out the carrier information. Each carrier requires specific, unique information and must be filled in for the carrier to be created successfully.
- Account information needed for registration.
- Click "Confirm" to finish the setup.


Creating a carrier & service for marking orders as externally shipped
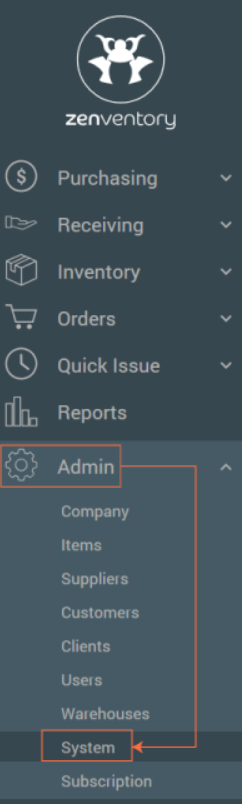
- Navigate to “Admin” and select “System”
- Go to the “Shipping” tab and select “Carriers”
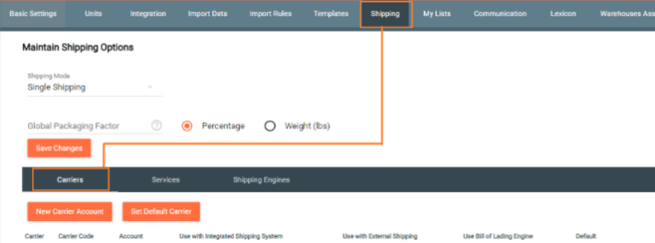
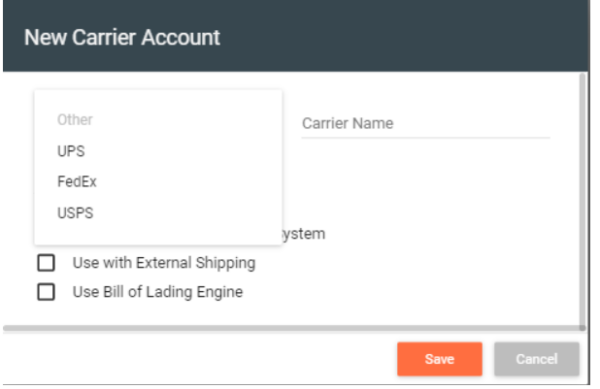
- Select “New Carrier Account.” From the dropdown, select the carrier you would like to add, check the boxes that apply and Save.
- Once the carrier account has been saved, Select “Services”
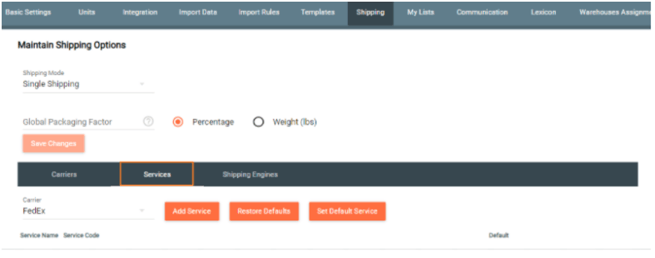
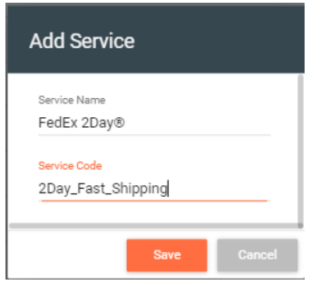
- Choose the Carrier in the dropdown and select “Add Service”. In Service Name, it must match the existing Service Name exactly if you're looking to align with any external system's shipment updates so you can copy and paste, including any symbols. The Service Code must match the value of the Ship Via field exactly as well if you are looking to use the Ship Via field to map carrier & service selections for imported orders. Repeat until all services have been added.
- You're done!