![Untitled design (24)-1.png]](https://help.zenventory.com/hs-fs/hubfs/Logos/Untitled%20design%20(24)-1.png?width=60&height=60&name=Untitled%20design%20(24)-1.png)
Prerequisites:
- Must have a Zapier account that supports multi-step actions. Note: This is configured below as a 4-step "Zap" and will consume that many of your monthly credits each time it runs, so review your plan tier and understand how it may impact your pricing on the Zapier end of things before proceeding with setup.
- Zenventory must be a connected app in your Zapier account (walkthrough)
Configuring the action:
-
Log into your Zapier account.
-
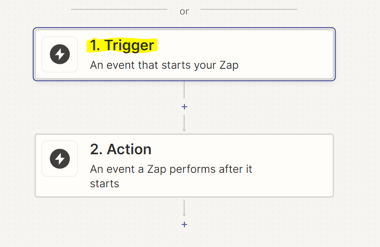
Click the button for "+ Create Zap"

-
Click the "Trigger" button to set a trigger.
-
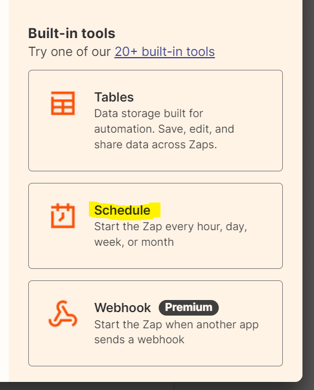
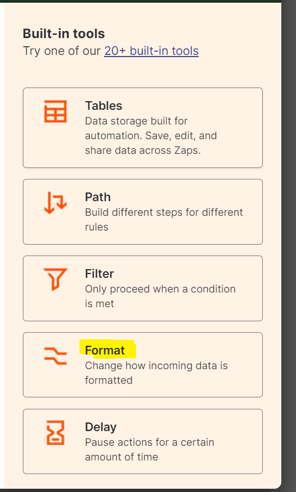
In the Search field or in the "Built-in tools" section, find and select "Schedule by Zapier". This will allow us to set a trigger that runs on a regular schedule.
-
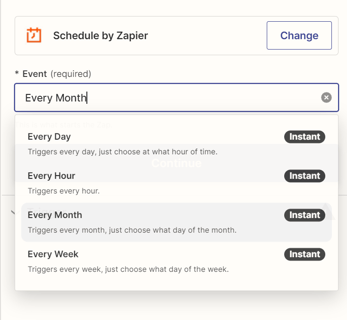
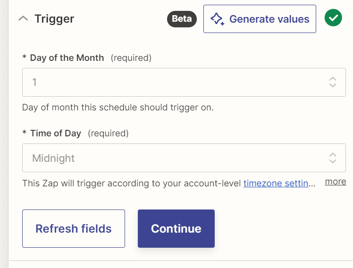
Choose your event, day, and time intervals. For the rest of this walkthrough, we'll be demonstrating the setup for "Every Month", "Day 1", and "Midnight" for use cases requiring a monthly report to be sent at the beginning of each month.
-
If Zapier requires you to test the trigger before proceeding, test it and then click "Continue with selected record".
-
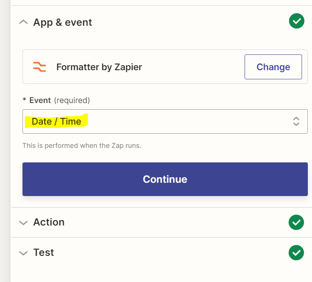
Now you'll be prompted to add Actions. Our first action will be a Format step (Formatter by Zapier). Since Zenventory & Zapier have some differences in their default date-time formats, this step is needed to format the date for later steps.
-
Under "Event", choose "Date / Time" and click Continue.
-
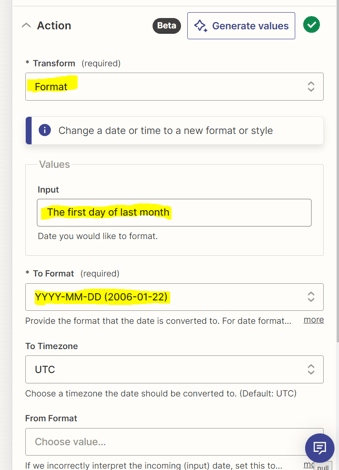
Under Action -> Transform, choose "Format". Since we're looking to get a monthly report in this example scenario, we will enter "The first day of last month" as our date (this will be used as the start date of the report later in the process). In the "To Format" field, choose YYYY-MM-DD as shown.
-
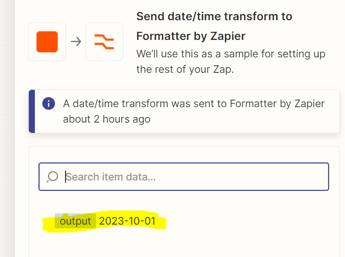
Test the Action if required. You should see a simple date result (the first day of last month), formatted as shown below. If it looks good, click Continue.
-
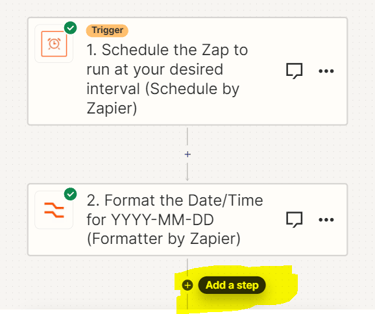
You should now have one Trigger (the scheduler) and one Action (the format step). We're going to add two more Actions, starting with one in Zenventory. Select "Add a step" to continue.
-
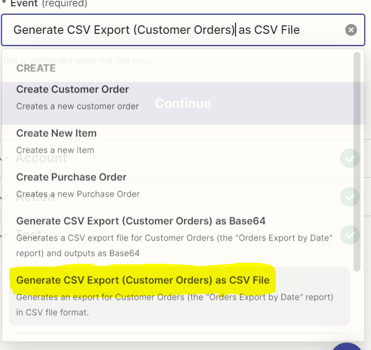
Select your Zenventory connection and under "Event", choose: "Generate CSV Export (Customer Orders) as CSV File".
-
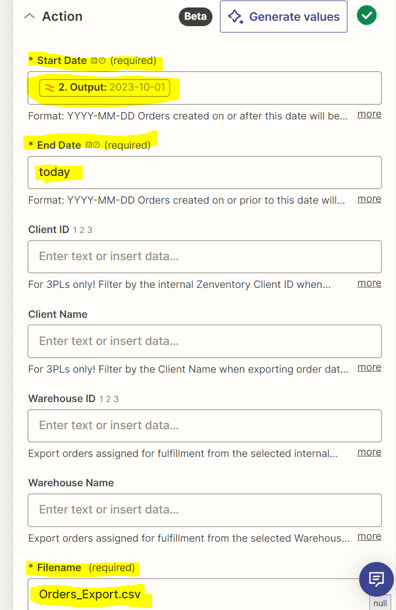
Three fields have required data input here: The Start Date, End Date, and Filename. For Start Date, you can point it to your output from the first Action (the Format step) as shown below. For End Date, simply enter "today" if you are creating a monthly report using the same interval as this walkthrough's example. Lastly, you can leave Filename as the default if you choose, or you can replace that with something dynamic if you want the files to be named in a more useful way (such as inserting a date, etc). If specifying a filename, be sure to end it with the .csv extension.
-
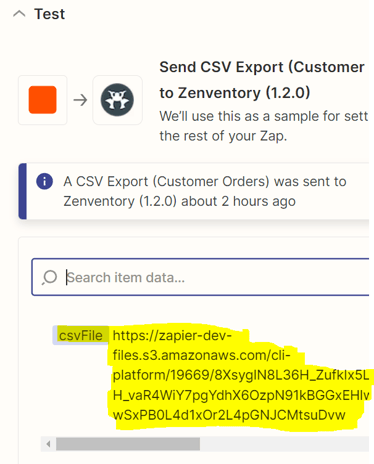
Click "Continue" and proceed with the test. A successful test will show a URL as the output as illustrated below:
-
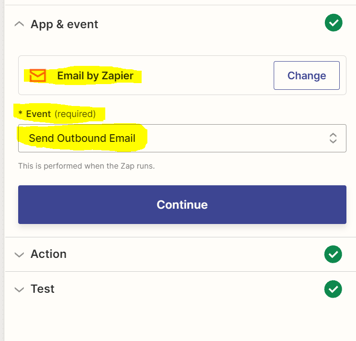
If all is well, we are ready to configure our last Action: Actually sending the email with the file attachment of your export. We'll use "Email by Zapier" and the "Send Outbound Email" event in this example, but there are a lot of options on how to configure this final step if you prefer another email app.
-
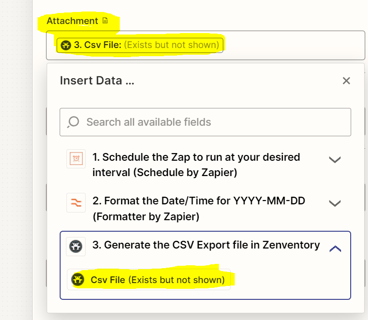
Configure the rest of the email however you like, but to include the file attachment of your export, click the "Attachment" field and be sure to select the "Csv File (Exists but is not shown)" option to retrieve the file from your previous Zenventory step as shown below.
-
Click "Continue" and give it a test. If your email comes through with the attachment, all is well and you're done! 👍 If not, contact us and we'll be glad to assist you with troubleshooting.