![Untitled design (24)-1.png]](https://help.zenventory.com/hs-fs/hubfs/Logos/Untitled%20design%20(24)-1.png?width=60&height=60&name=Untitled%20design%20(24)-1.png)
Units of Measurement in Zenventory
Zenventory features a system for units of measurement, hereafter referred to as “UOM”, that can be used to simplify the process of maintaining correct item counts. Each item has a base unit associated with the smallest unit to be individually counted (the default is “Each”). This unit can be assigned a different label for convenience to match how you would normally count the item. Additional units can be defined as multipliers of the base unit. These multipliers can be used when receiving items or fulfilling orders to maintain correct counts of stock without manually converting units at the time of an order or receipt of items.
The feature applies only to receiving and customer order fulfillment. Currently, Zenventory does not track inventory by UOM after it has been received into stock. All items in stock will be measured by their base UOM.
Example:
If you typically receive a product in boxes that each contain a consistent quantity of items, you may wish to define a box as a UOM equal to that many individually counted items. You may receive any number of boxes, and Zenventory will automatically multiply that out by the quantity per box upon receipt and add the appropriate number of items to your inventory. You may also make that product available to order by the quantity in a box. When an order for boxes of the product is fulfilled, Zenventory will deduct the product of the quantity of boxes ordered and quantity per box and thereby the appropriate stock.
Viewing in-stock inventory quantity in alternate UOMs:
If you frequently need to be able to quickly spot check an item (one that is normally tracked in Eaches) for how many you have in Cases for example, you can use Zenventory's kitting feature to do the translation for you on the Inventory screen. Example: You can set up a kit SKU with a Bill of Material containing qty=12 Eaches, set the kit SKU to something with an easy-to-understand prefix or suffix like {the item's normal SKU}-CASE. This will allow you to easily review the Kits tab anytime to see how many you have with the quantity translated to an alternate unit.
How to Create a Unit of Measurement:
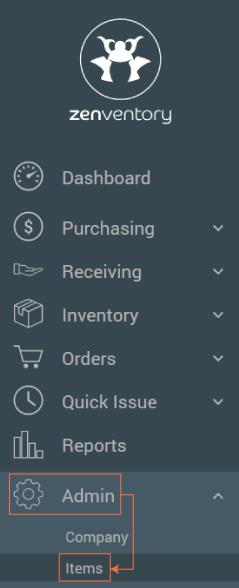
- Click "Admin" in the left menu and select "System" from the drop down.
- Click "Units" in the light grey bar below the orange strip above. Click "Add New Measurement" and Name the measurement and give it a quantity.
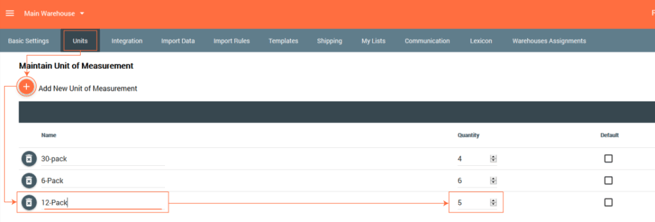
- Click the "Orange Disk"
 icon on the right to save
How to Assign a Unit of Measurement to an Item:
- Click on the "Admin" section and select the "Items" from the dropdown.
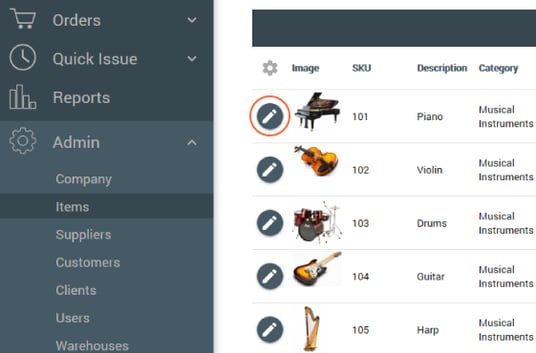
- Search for your item to locate it, and click the "Edit Item" pencil icon.
- Click "Units" in the light grey bar below the navigation bar. Next, select a new UOM and quantity you’d like to apply to the item.
- Assign any UOM specific UPC/barcode values. This would represent the barcode value that shows on a box, package, etc. This value can then be scanned to recognize the item and its UOM during Purchase Order management, receiving, or Customer Order management.
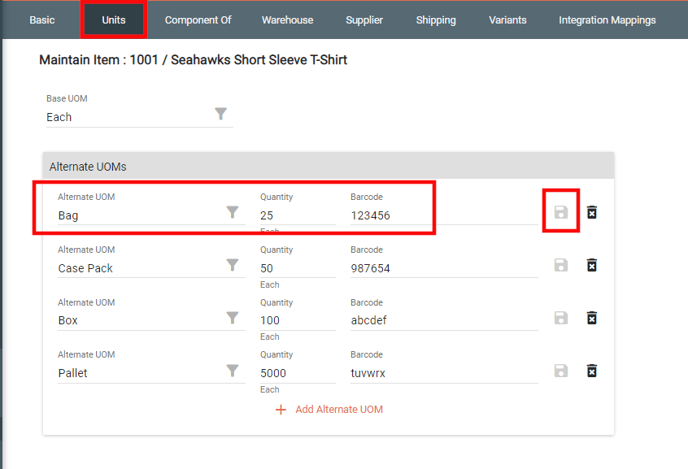
- Click the disk icon on the right to save.
- Repeat steps 3, 4, and 5 for any other UOM you would like to define