![Untitled design (24)-1.png]](https://help.zenventory.com/hs-fs/hubfs/Logos/Untitled%20design%20(24)-1.png?width=60&height=60&name=Untitled%20design%20(24)-1.png)
Before your pickers can use Pick to Tote, Zenventory needs to know about the carts and totes in your warehouse. First you describe each kind of cart (how many shelves it has and how big each shelf is) and each kind of tote (its inside and outside size). Then you add the actual carts and totes and print a barcode label for each one.
Pickers scan these labels in the mobile app to claim a cart and load totes onto it. Zenventory uses the sizes you enter to decide which orders fit in which totes. Set this up for each warehouse before anyone starts picking to tote, and come back whenever you get new carts or totes.
Before you start
- You need the Manager role.
- If your account has renamed "Cart" or "Tote", the menu and field names on the web will differ from this article. The mobile app always says "Cart" and "Tote". Cart and tote statuses and fields
- Set your Active Warehouse to the warehouse the carts and totes belong to. Carts and totes are set up per warehouse.
- Measure your carts (length, width, and height of the space on each shelf) and your totes (inside and outside dimensions) in inches. The cart and tote windows don't show a unit, but Zenventory compares these to item storage dimensions, which are in inches.
- Optional: fill in item storage dimensions. They aren't required. If an item has storage dimensions, Zenventory uses them when assigning orders to totes. If not, each order is simply assigned to one tote. Pick to Tote: Overview
Set up your carts and totes
Part 1 of 4: Create a cart type
A cart type tells Zenventory what your physical cart looks like: how many shelves it has and how big each shelf is. Zenventory uses this to show pickers each shelf when they load totes in the mobile app, and to check which orders fit in the totes on each shelf.
1) Go to Admin → Carts & Totes.
2) On the Manage Carts tab, click Manage Cart Type.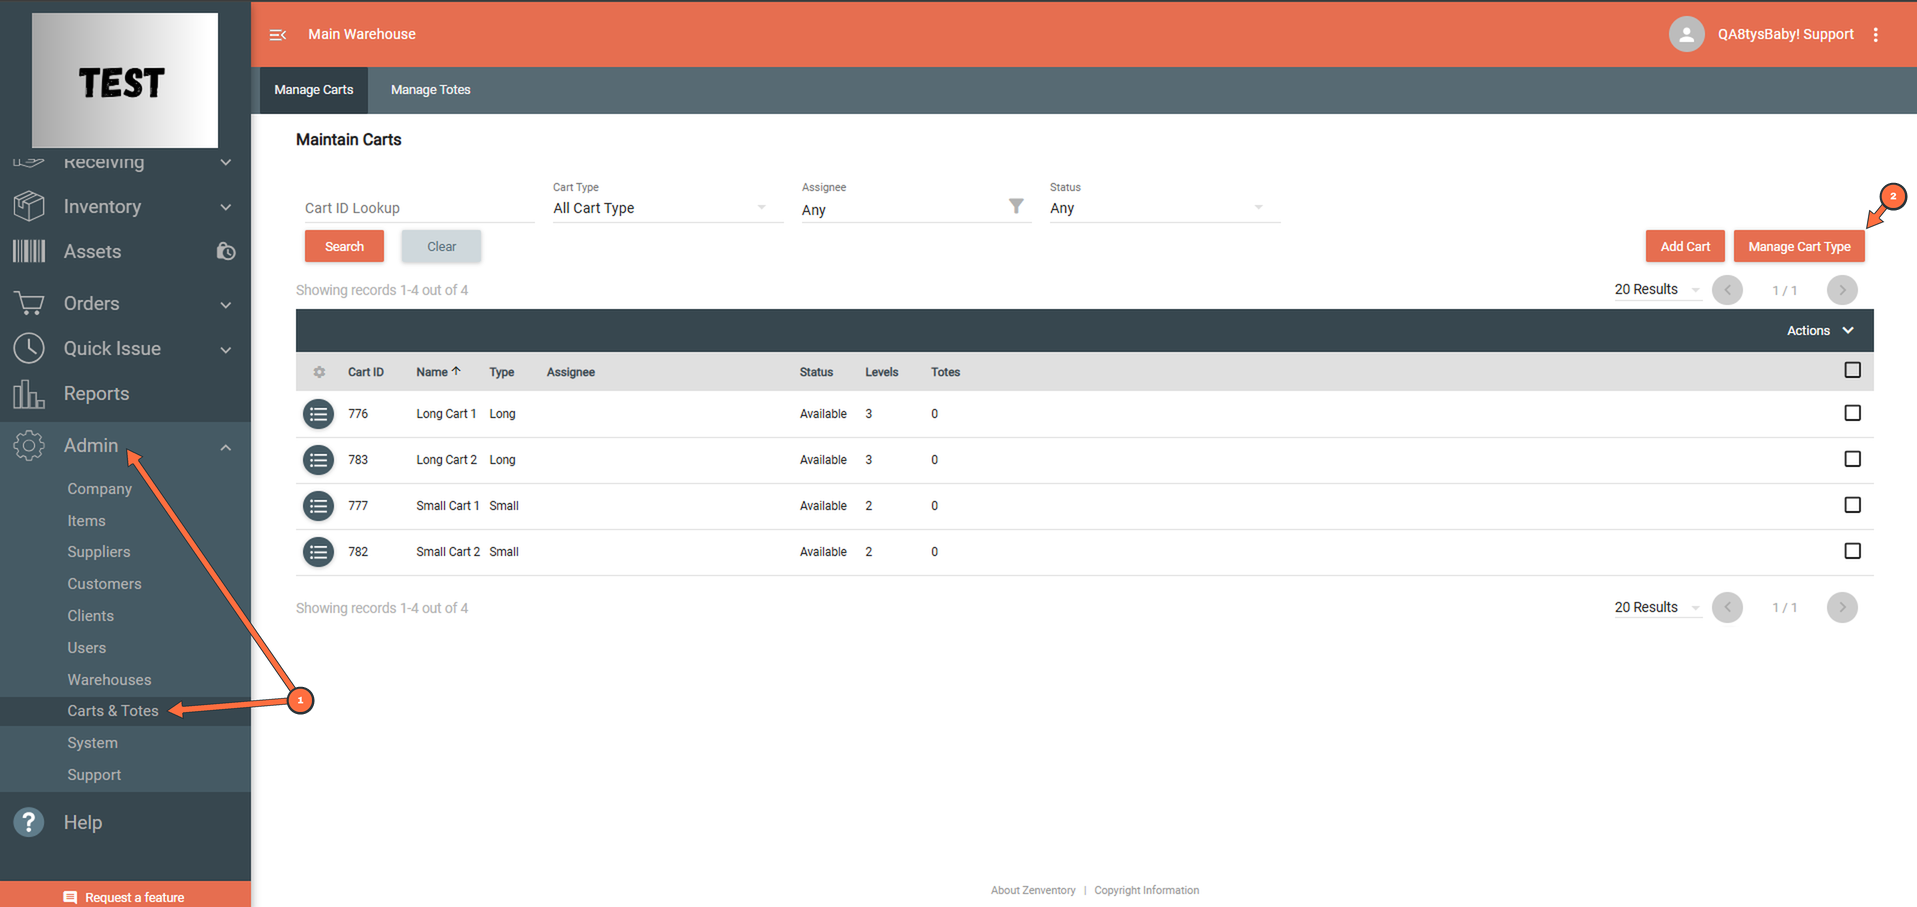
3) Click Add Type.
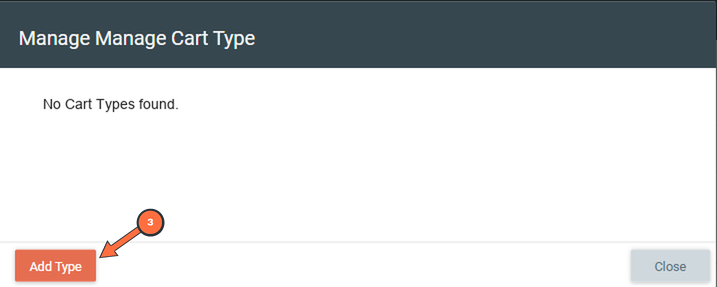
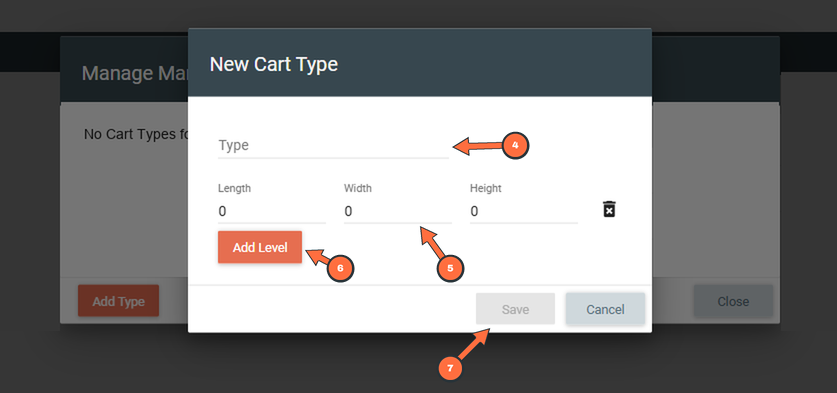
4) In Type, enter a name of up to 30 characters, for example "6-Shelf Cart".
5) Enter the Length, Width, and Height of the top shelf, in inches. This becomes Level 1, which the mobile app shows as the top shelf. Height is the open space between this shelf and the one above it.
Note: The Height you enter for each level matters. When Zenventory checks whether an order fits in a tote, it uses the tote's Inner Length and Inner Width, but for height it uses the cart level Height (the open space up to the shelf above), not the tote's Inner Height. Items can stick up above the tote's rim as long as they fit under the shelf above. The tote's Inner Height is only used to stop items from being stacked on top of each other higher than the rim. Pick to Tote: Overview
6) Click Add Level and enter the dimensions of the next shelf down. Repeat for each shelf, working from the top of the cart to the bottom.
7) Click Save.
Plan your layout: Zenventory doesn't check whether totes physically fit on a level, or limit how many totes go on one. Use your shelf and tote measurements to decide how many totes each level holds, and let your pickers know.
Part 2 of 4: Add carts
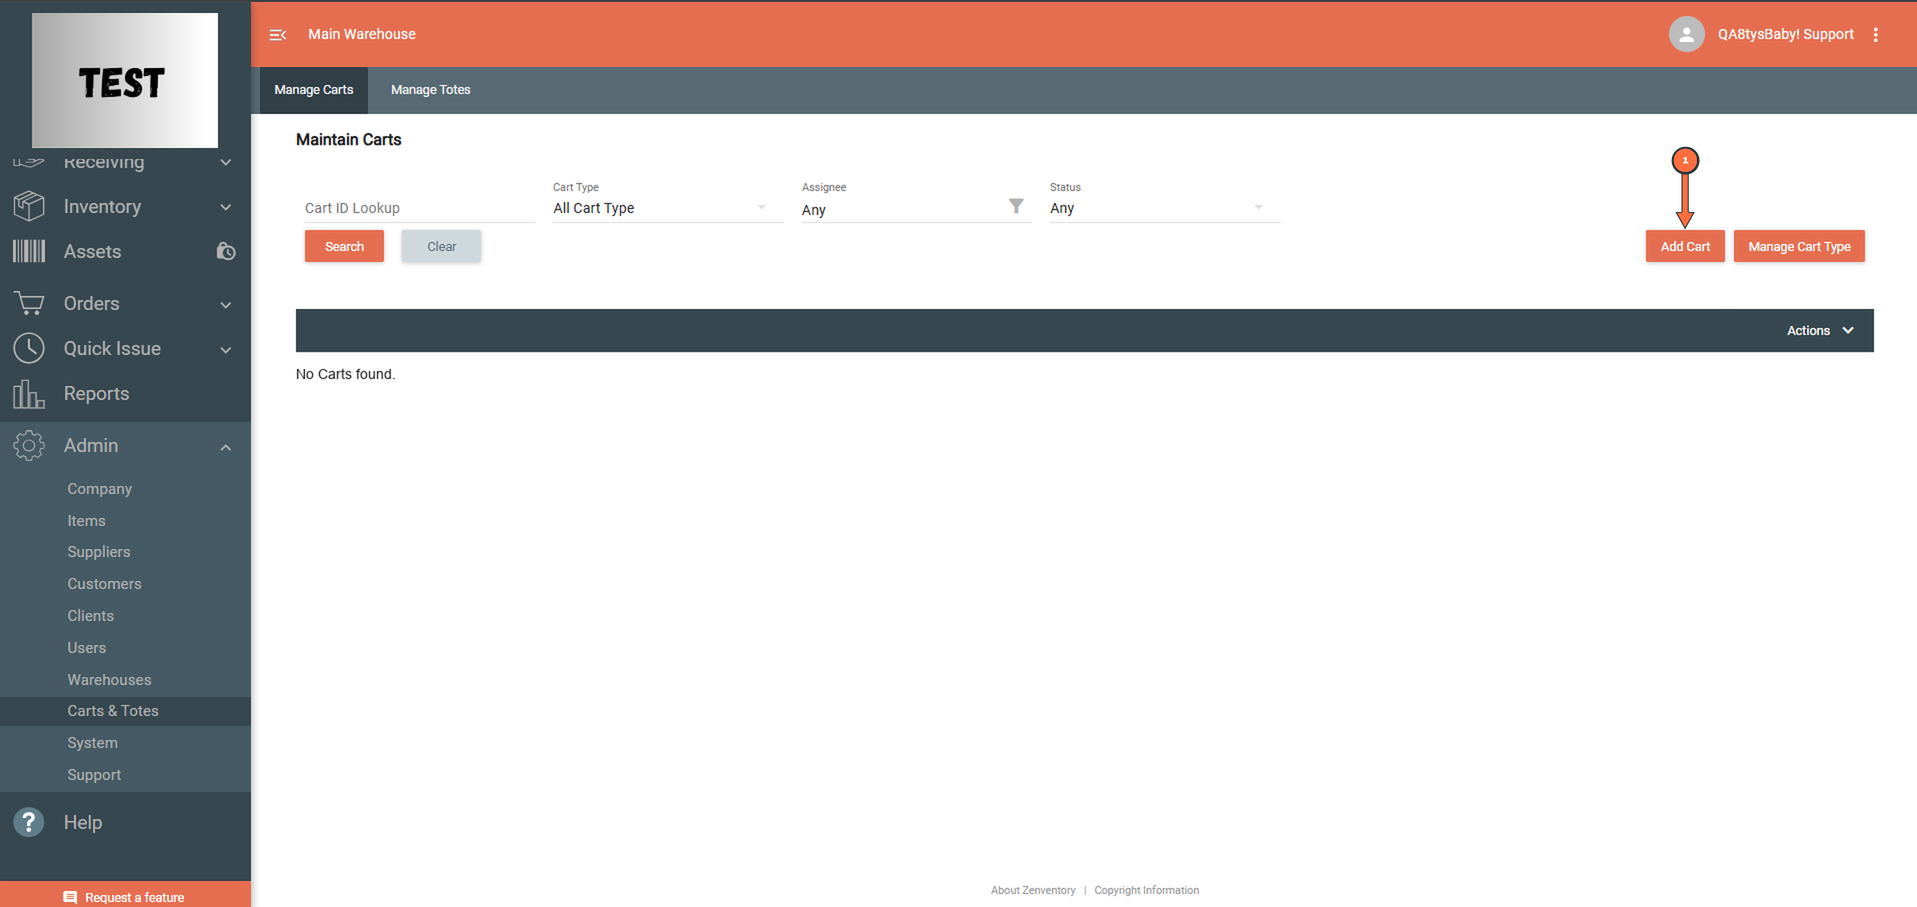
1) On the Manage Carts tab, click Add Cart.
2) In Name, enter a name of up to 30 characters, for example "Cart 1".
3) Select the Cart Type. The window shows the cart's levels and their dimensions.
4) Click Save.
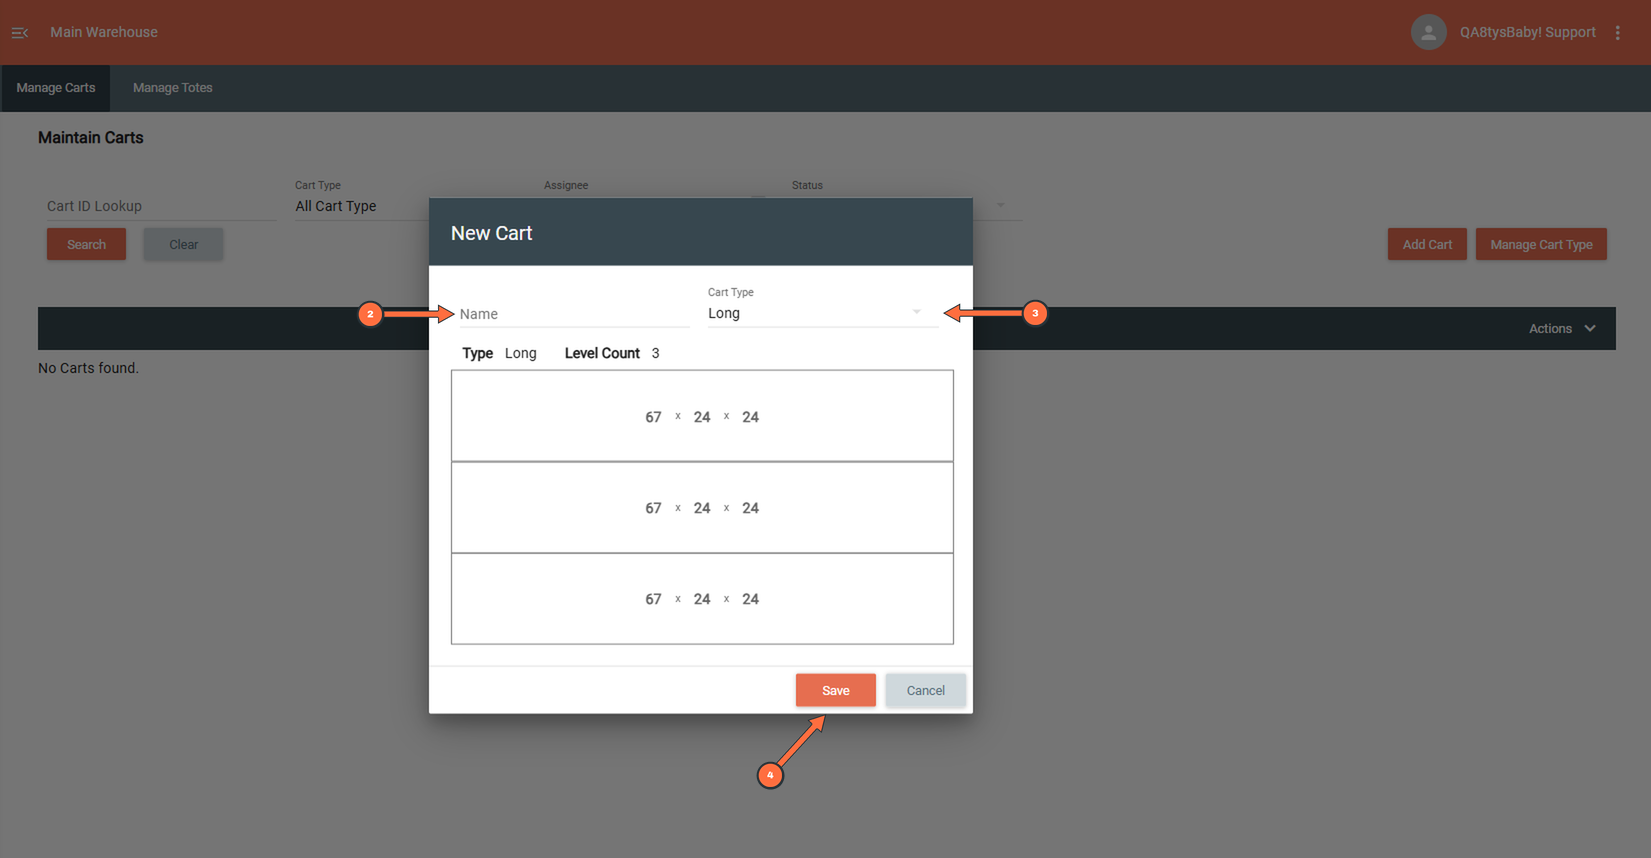
Your new cart now shows on the Manage Carts tab as Available, ready for a picker to use.
Part 3 of 4: Create a tote type
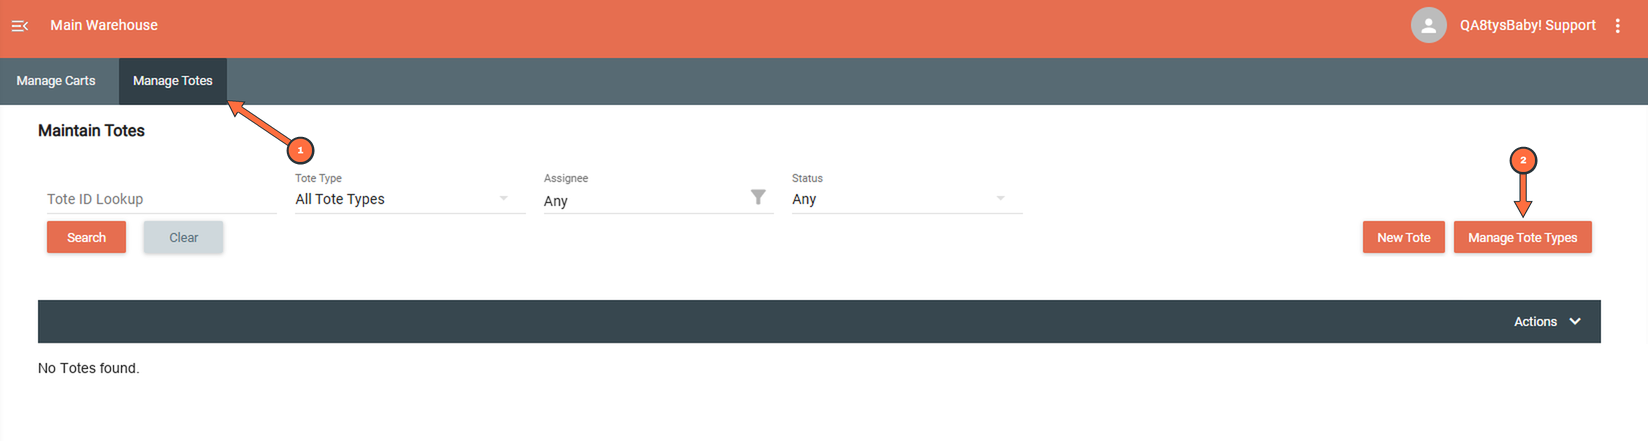
1) Click the Manage Totes tab.
2) Click Manage Tote Types.
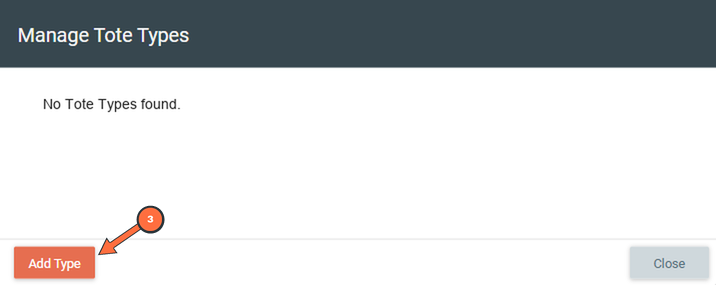
3) Click Add Type.
4) Enter a Name of up to 30 characters, for example "Large Tote".
5) Enter the Inner Length, Inner Width, and Inner Height (the space inside the tote), in inches.
6) Enter the Outer Length, Outer Width, and Outer Height, in inches.
7) Optional: choose a Color so pickers can tell tote types apart. If you skip it, the color is white (#FFFFFF).
8) Click Save.
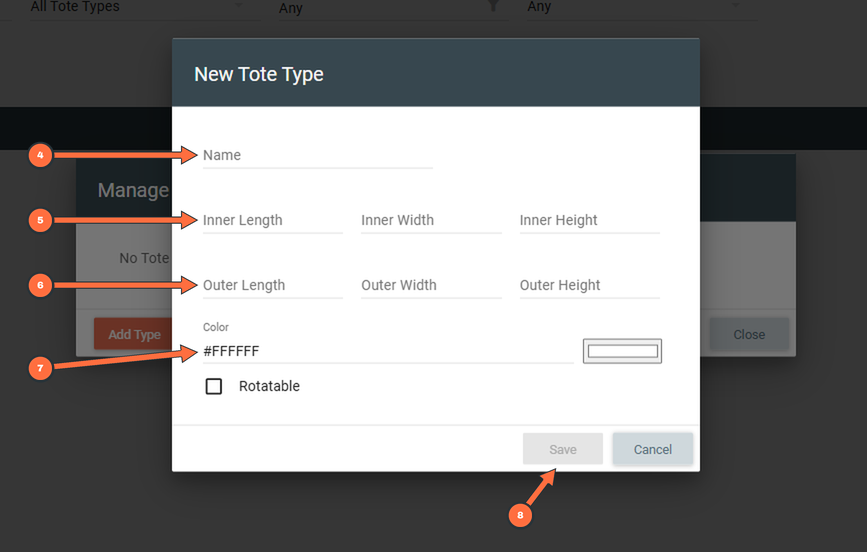
Note: The Rotatable checkbox is for a future feature. It doesn't do anything yet, so you can leave it unchecked.
Part 4 of 4: Add totes
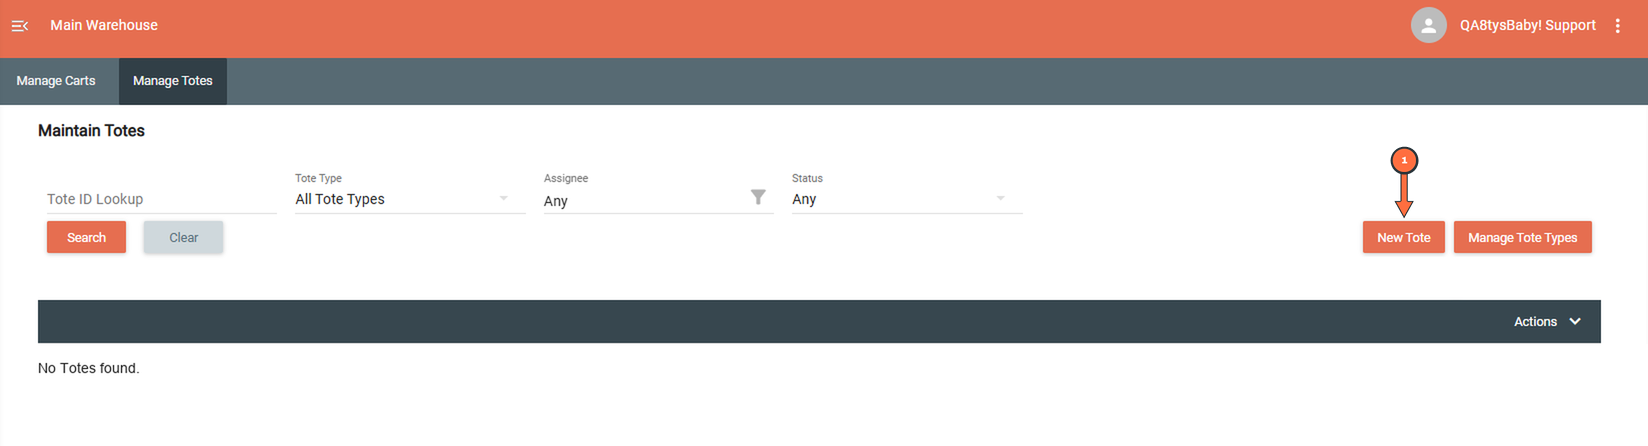
1) On the Manage Totes tab, click New Tote.
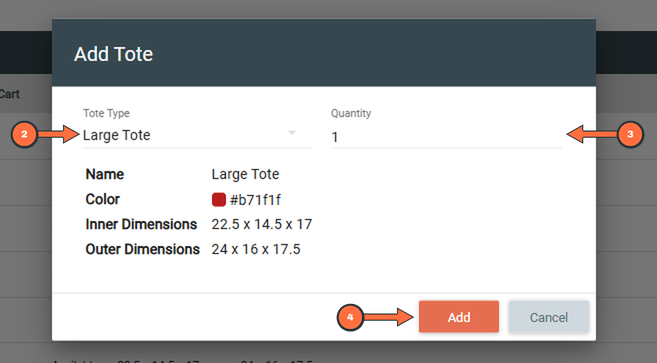
2) Select the Tote Type. The window shows its name, color, and dimensions.
3) In Quantity, enter how many totes of this type to add, from 1 to 50.
4) Click Add.
Zenventory adds that many totes to the Manage Totes tab, each with its own Tote ID and a status of Available. The Tote ID is what’s printed on the tote’s barcode label, so pickers can tell each tote apart even when they’re all the same type.
Print Cart and Tote Barcodes
Barcode labels let pickers and packers scan carts and totes instead of typing their IDs. Labels are optional, but they make claiming carts, loading totes, and packing faster.
1) On the Manage Carts or Manage Totes tab, select the checkbox for each cart or tote you want to label.
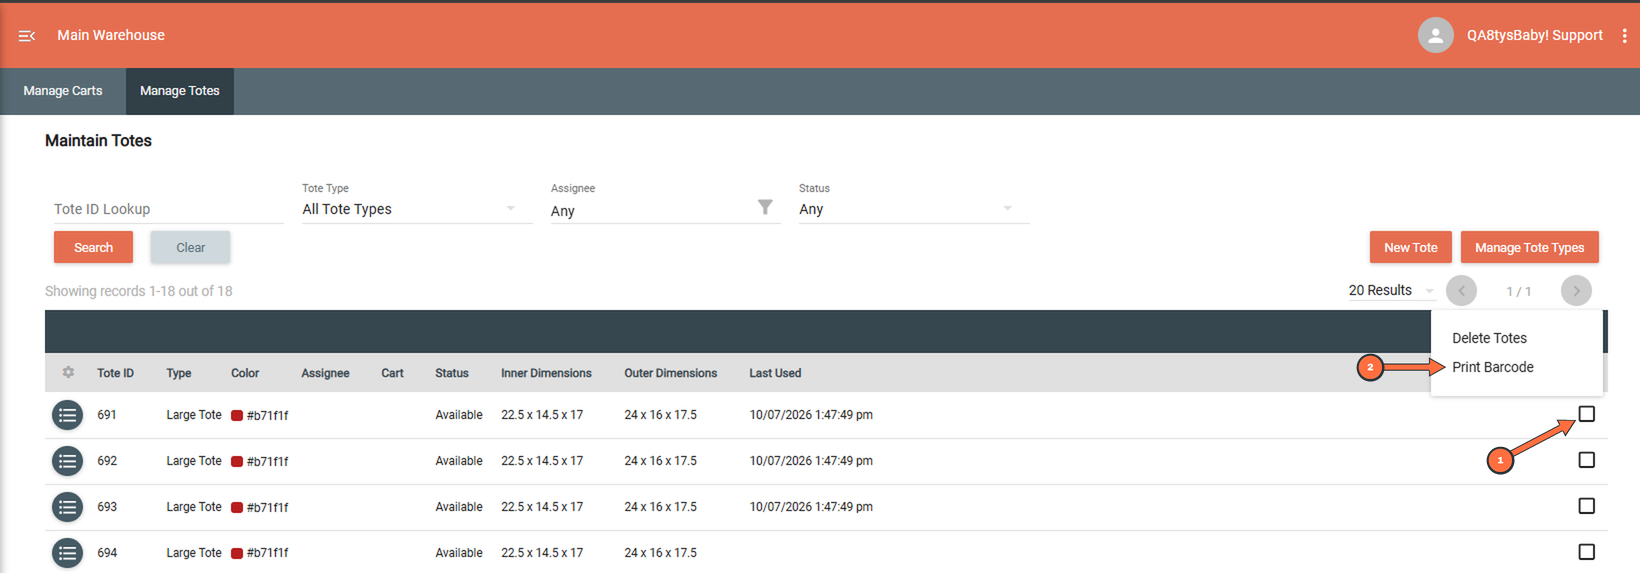
2) Click Actions → Print Barcode.
3) Enter the number of Copies.
4) Click Print.
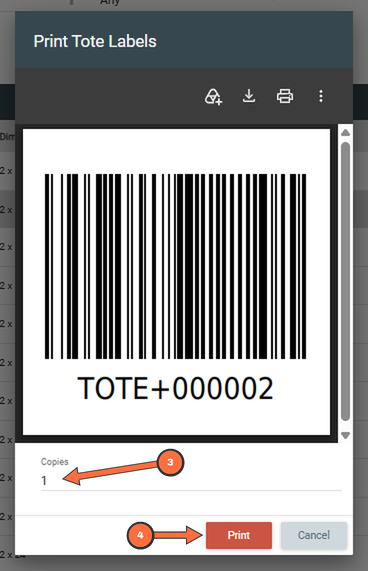
Labels print as a 2 x 2 inch PDF that you can print or download. The label size and layout can’t be adjusted.
Edit carts and totes
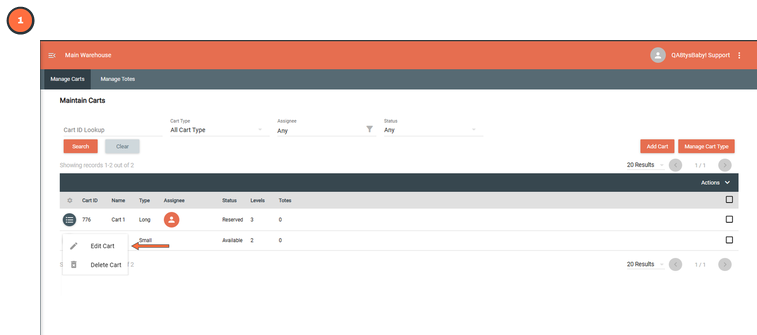
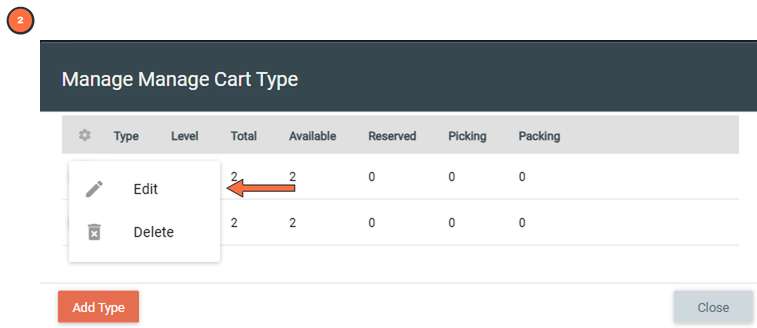
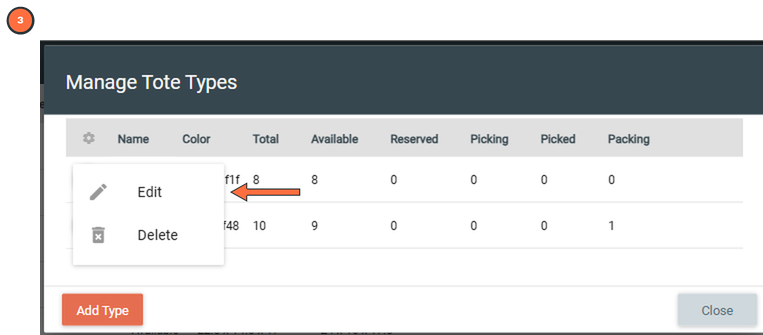
- You can rename a cart anytime, but its Cart Type can only be changed while the cart is Available.
- A cart type's levels can't be changed while any of its carts are in use.
- Totes can't be edited one at a time. Edit the tote type instead, and every tote of that type is updated.
Delete carts and totes
You can only delete carts, totes, and their types while they're Available, meaning no one is using them.
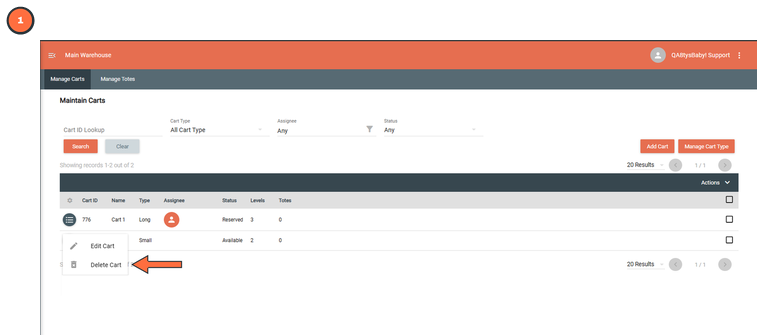
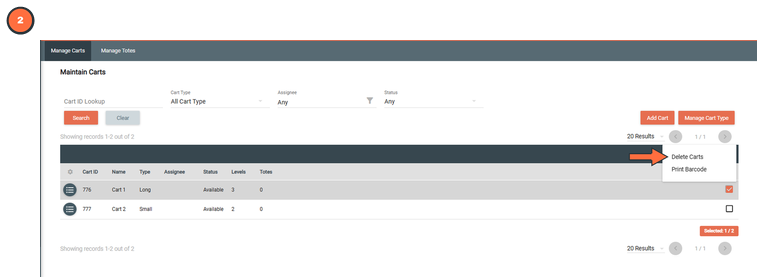
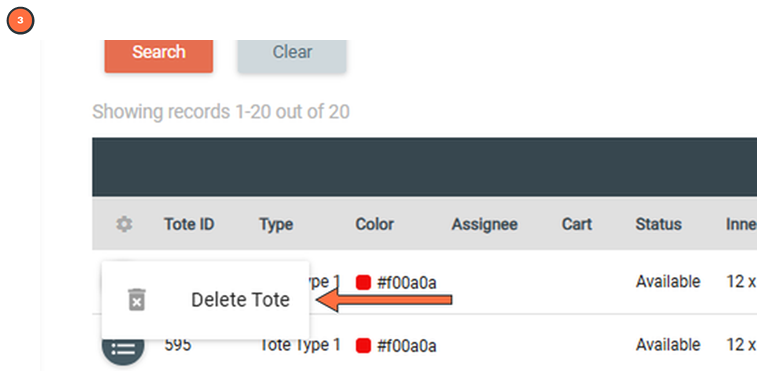
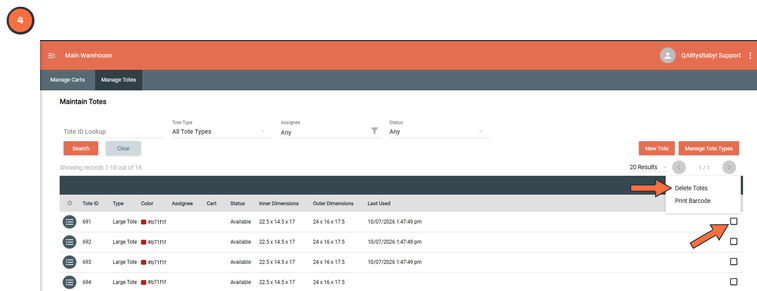
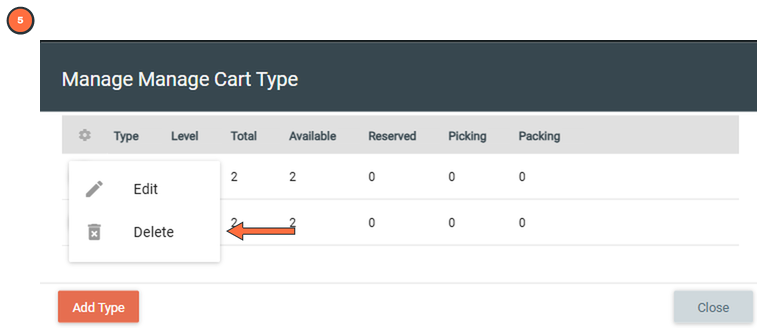
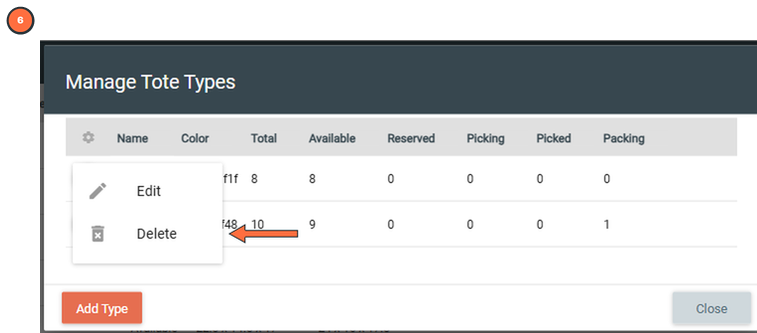
Deleting a type deletes everything of that type. Deleting a cart type also deletes all of its carts, and deleting a tote type also deletes all of its totes. Cart types are deleted right away, without a confirmation message.
Deleting several at once skips anything in use. Carts or totes that aren't Available stay in the list.
Common issues
Problem: "Another Cart already uses that Name." (or the same message for a cart type or tote type)
Fix: Names must be unique. Choose a different name.
Problem: The Save button is greyed out.
Fix: Fill in every required field. For a cart type, that's the Type name and a Length, Width, and Height above 0 for every level. For a tote type, that's the Name and all six dimensions above 0.
Problem: "This Cart Type cannot be deleted as there are Carts in use." (or the same message for a tote type)
Fix: Wait until every cart or tote of that type is Available, then try again.