![Untitled design (24)-1.png]](https://help.zenventory.com/hs-fs/hubfs/Logos/Untitled%20design%20(24)-1.png?width=60&height=60&name=Untitled%20design%20(24)-1.png)
Zenventory has the capability of handling shipments through an established Fedex, UPS, or USPS account. For help adding your shipping carrier, check out this help article: Adding a shipping carrier/service.
Updated Functionality 9.15.22 V3.97: Combined Shipments: If two or more orders are shipping to the same address, they can now be easily combined & shipped together from the Ready to Ship screen using the Action menu, and any integrated order sources linked with the orders will be updated with the shared tracking number. Detailed steps are here: Combined Shipments Article.
Updated Functionality 6.7.22 V3.92: Address validation now happens automatically in the background shortly after orders are created, and a new visual indicator has been added to all orders screens to display the validation status for each order. For addresses that fail to validate, clicking the indicator will show more info and allow for corrections to be made.
Shipping an Order
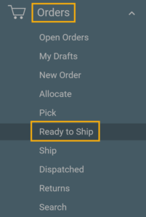
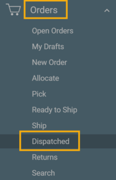
- Once an order has been picked, it then moves to "Ready to Ship". Navigate to "Orders", then "Ready to Ship" screen.
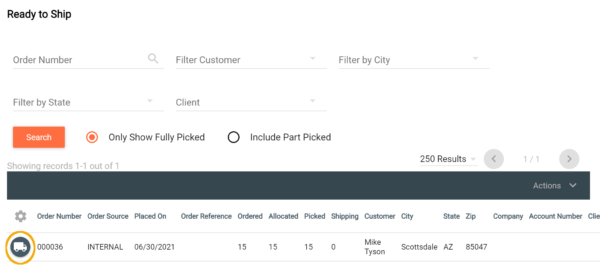
- Select any filter criteria you need to find the order you wish to ship.
- Click on the delivery truck icon to the left of the order number to pull up the create shipment page.
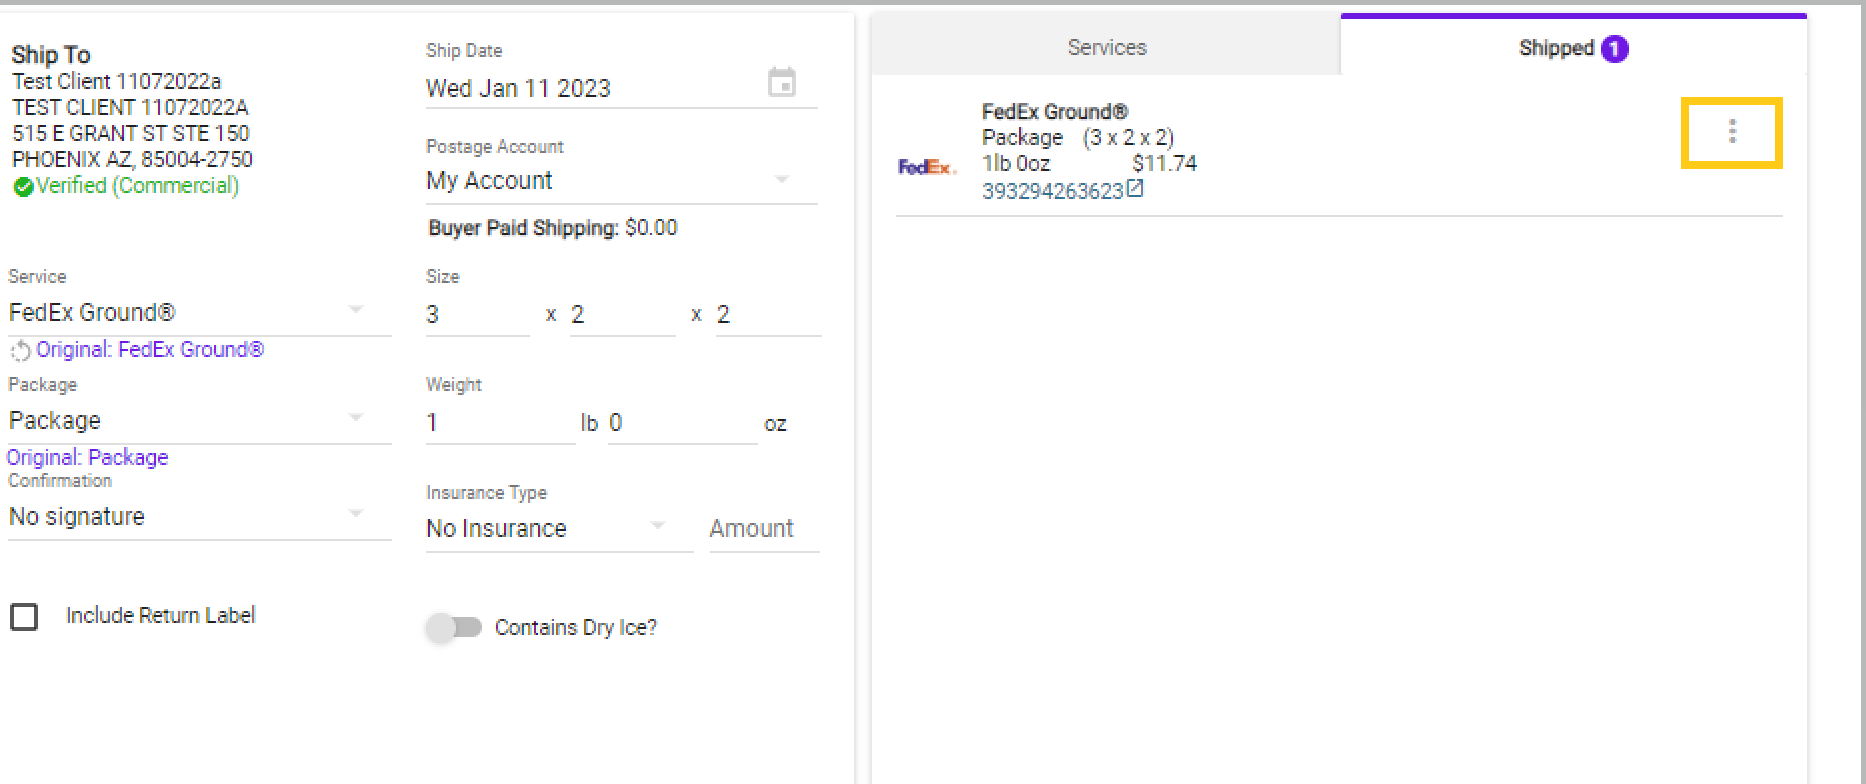
- Enter in desired shipping information (information already entered on the order creation will populate the according field here automatically). *NOTE: shipment weight, carrier service, and packaging must be entered prior to checking rates. Make sure to double check all information prior to proceeding. The rate shopping tab on the right allows you to view rate estimates starting at the lowest rate.
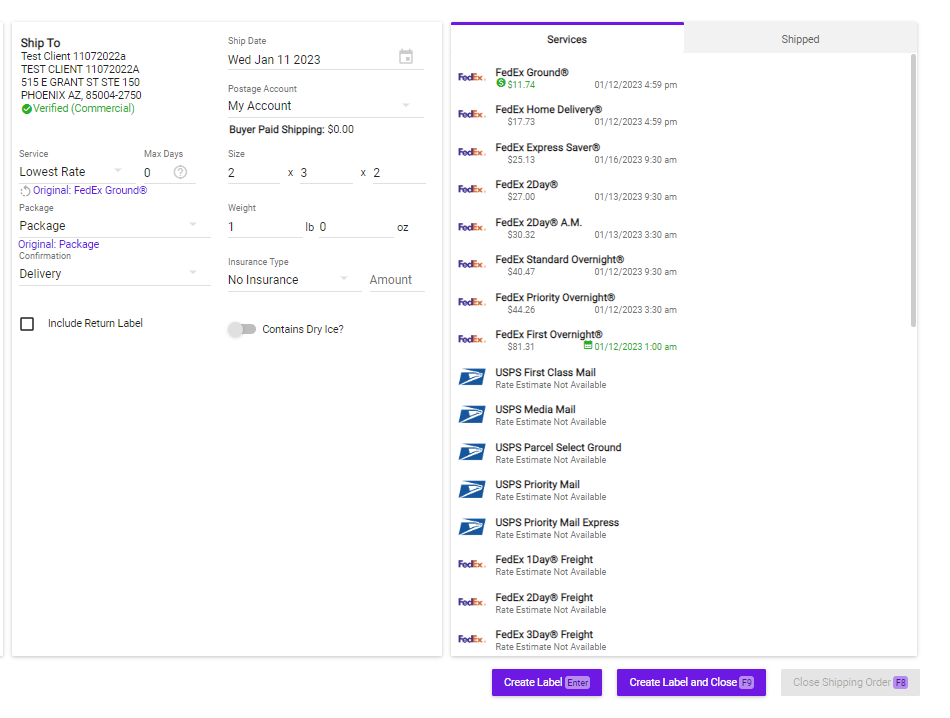
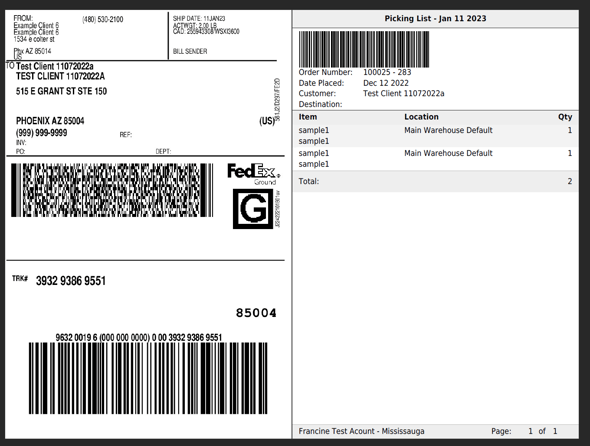
- Once all information is entered, and verified, click "Create Label". This will create the shipment, tracking number, and pull up a window in your browser to print the shipping label. NOTE: If you need more than one shipping label for the shipment, you can click the "Create Label" button as many times as needed to create more labels and new tracking numbers.
- The "Shipped" tab on the right will display existing shipments. The action menu will allow you to view and re-print documents.
- Once completed creating all your needed labels, click "Close Shipping Order"
 . Once the order has been closed, you will not be able to go back and create additional labels for this shipment. By closing the shipping order, the shipping page refreshes, ready to handle the next order to ship. The closed shipment now moves to "Dispatched" orders.
Reprinting Shipping Labels
- Navigate to "Orders", "Dispatched".
- Click the "3 Line" Icon
 to the left of the order you wish to reprint a label for. Click "Shipping Info" on the pull down menu that pops up. If you would like to print multiple labels at one time, see Optional Step at the bottom of the page.
- Click the "View Label"
 icon to the left of the tracking number to reprint the label.
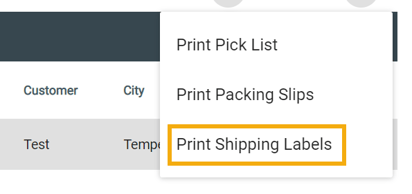
Optional Step for reprinting multiple labels at once.
- From the "Orders">"Dispatched" screen, select the check box to the right of every order you would like to reprint a label for. Then click the "Actions" menu button. From the pulldown "Actions" menu, select "Print Shipping Labels". This will pull up all the labels to be printed at once.