-1.png?height=120&name=Untitled%20design%20(24)-1.png)
An active ShipStation integration is required before you can complete the steps in this article. To integrate ShipStation for the first time, check out this article first.
To send orders from Zenventory to ShipStation, you'll need to designate a ShipStation "Store" to upload the orders to. Note: If you are a 3PL fulfillment provider, you'll need to do this once per Client integration.
How to set a ShipStation store to receive Zenventory orders
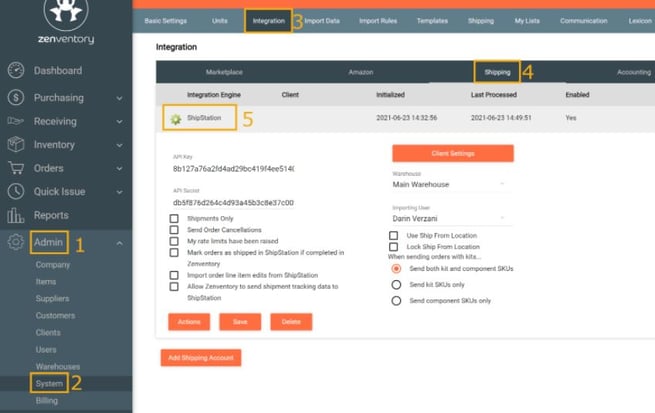
- Navigate to your ShipStation integration settings in Zenventory by heading to the Admin > System > Integration > Shipping > ShipStation page. Steps 1-5 in order in the picture below.
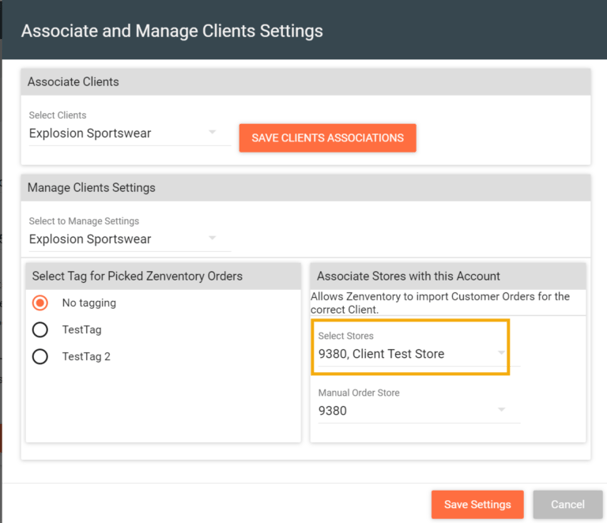
- Click on the orange "Client Settings"
 button.
 - Select the client you would like to work with (for 3PL's) or use yourself for your own ShipStation integration. Select the store you would like to associate with this account. NOTE: If your ShipStation account has multiple stores, you can select as many or as few as you would like in this step. If any Stores are already assigned to the integration, you'll be able to designate one as the "Manual Orders Store" using the dropdown at the top. If not, you'll need to check at least one from the list below first. This is the store that will receive any new Zenventory orders. Click the orange "Save Settings" button when finished.
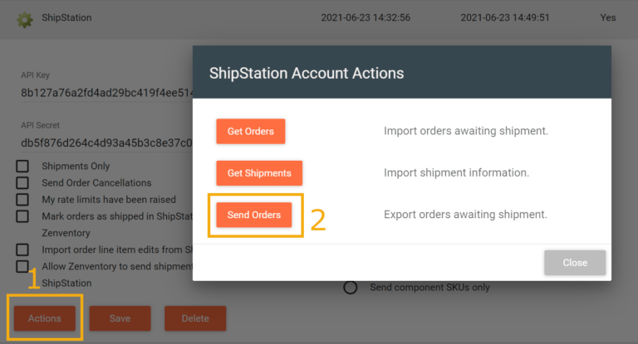
- Click the orange "Action" button (1), then click the orange "Send Orders" button (2). This will force any "Ready to Ship" status orders to be sent into ShipStation.
- Orders that are in "Ready to Ship" status will upload to ShipStation automatically every 5 minutes automatically, or as often as you like using the "Send Orders" button from the Actions menu.
If the error "1 order could not be posted to ShipStation", appears when clicking "Send Orders"
Workaround:
Navigate to Orders > Open Orders > Click the three dots/three lines button > Edit Order and from here click the green pencil icon in the Ship To address and confirm that there are no address discrepancies. Those discrepancies can range from the address being in line 2 when it needs to be on line 1 or the city being incorrect, etc. Save the order once everything looks correct. Note: Saving the order will unpick the items of the order and if Auto Pick is not enabled, you will have to re-pick those items manually in the Pick screen and that this process will need to be completed for the number of orders returned in the error message.
Back on the Open Orders page, click the check box to the right of the edited order and click Reprocess in the Actions drop down menu. This is an added layer of security to ensure the address is updated in the system properly. After the order is repicked and is in Ready to Ship, navigate to Admin > System > Integration > ShipStation > Send Orders. The error should not reappear and the order should import properly at this point.