-
After stock has been allocated, the next step is to find and collect the required items in preparation for packing and shipping. To accommodate various work flow requirements, there is a lot of flexibility in this step based on your preferences. During order picking, some or even all requirements for user interaction in Zenventory can be bypassed by enabling the appropriate Auto Pick setting (see System Settings), or it can be fully managed from start to finish by users for greater control and accountability. Zenventory updates stock levels at the conclusion of this step.
Order picking process
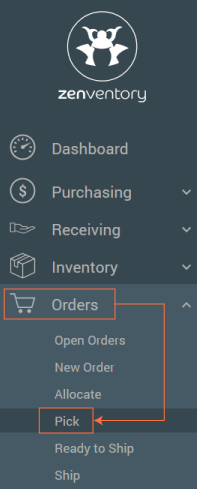
- Navigate to the “Orders” tab. Select "Pick" from the sub-menu. All allocated orders ready for picking will be displayed.
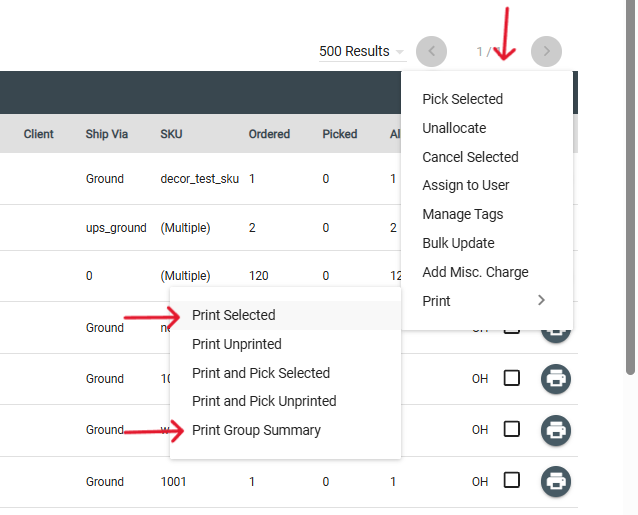
- Print Pick Lists - select the orders you wish to print pick lists for using the checkboxes on the right side of the screen, or the top checkbox in the column headers to select all orders in your view. Access the "Actions" Menu above those checkboxes and go the "Print" option
- Individual Order Pick Lists - choose the "Print Selected" option -- this will generate a new PDF of one pick list per customer order selected
- Group Summary Pick Lists - choose the "Print Group Summary" option - this will generate a pick lists with more than one order per page, in a condensed version to save paper.
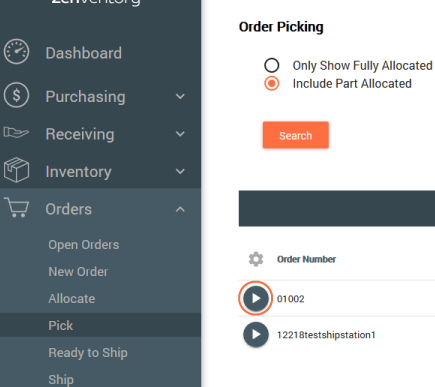
- An order to be picked must be claimed by a user with the "Picker" user role/permission. To get to the claim section for the order select the "Play" icon to the left of the order number.
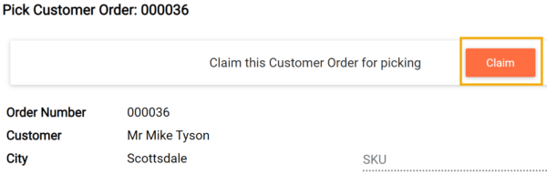
- Click the "Claim" button to claim the order being picked. Order claiming is a safeguard to ensure that two users aren't trying to pick/pack the same order, minimizing the chances of a duplicate shipment.
- Once the order is claimed, users can either scan item barcodes (if equipped with handheld scanners), or manually enter the quantity of the items being picked. To quickly mark all items in an order as complete, click orange box labeled "Mark All Complete", and the picked quantities will simply be set to match the amount needed for the order.
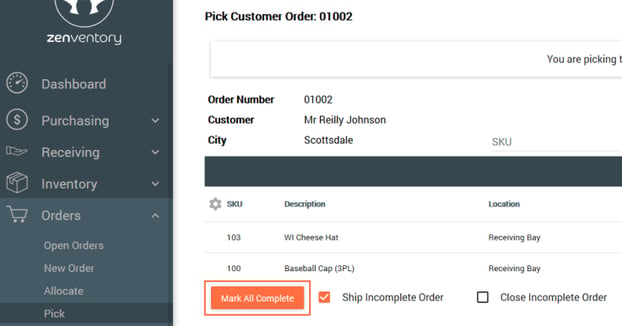
- Click "Confirm Pick" or "Confirm and Ship" to complete the picking process. Stock quantities will be deducted from inventory, and the order will move to the Ready to Ship status.
- "Confirm Pick" - completes the picking of the order. The order moves onto the Ready to Ship page
- "Confirm and Ship" - completes the picking of the order and immediately takes the user to the Orders>Ship page to ship it.
.png?width=670&height=216&name=Screenshot%20(1645).png)
- NEXT STEP: Shipping
- Navigate to the “Orders” tab. Select "Pick" from the sub-menu. All allocated orders ready for picking will be displayed.
English
![Untitled design (24)-1.png]](https://help.zenventory.com/hs-fs/hubfs/Logos/Untitled%20design%20(24)-1.png?width=60&height=60&name=Untitled%20design%20(24)-1.png)