![Untitled design (24)-1.png]](https://help.zenventory.com/hs-fs/hubfs/Logos/Untitled%20design%20(24)-1.png?width=60&height=60&name=Untitled%20design%20(24)-1.png)
Locations (or sub-locations) in Zenventory can be created manually in the UI one by one, or can be imported in bulk via spreadsheet.
To begin: Create a CSV file with four columns: Warehouse, Location Name, SKU, and Quantity. The SKU and Quantity can be simply a placeholder (Qty: 0), or it can be an existing SKU in the system with a real quantity you're trying to add into the counts. The Warehouse column should be filled in with the exact name of an existing warehouse, and the Location Name will be the desired new name of the sub-location(s) you want to create. Download Sample File
When importing, map the following fields:
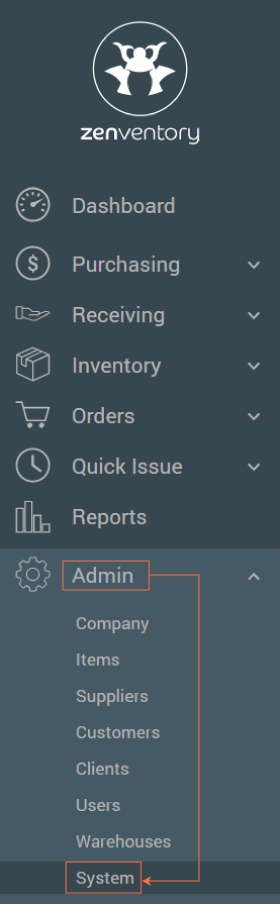
- Under the "Admin" section select "System"
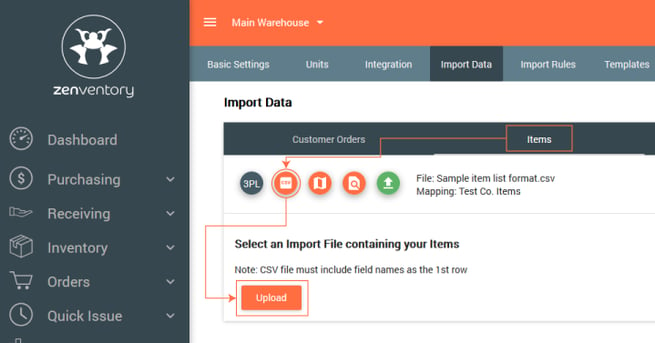
- From the horizontal menu at the top, select "Import Data".

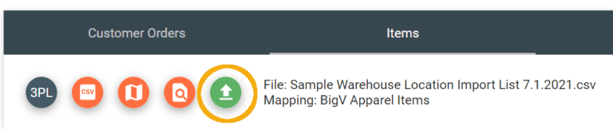
- Select the "Items" import tab from the options shown. Select the "CSV" icon to find and upload your file.
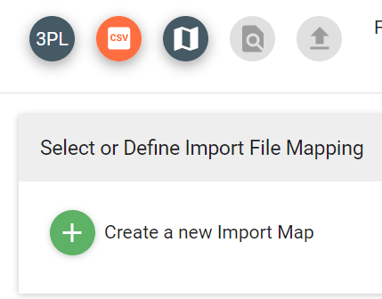
- Click on the green + icon to "Create a new Import Map".
- The next screen will have 3 section headings from top to bottom in this order. (1) Warehouse, (2) Location, (3) Item. Each section has different variables that can be mapped from your .CSV into the Zenventory system.
- Map "Warehouse Name" to the corresponding heading from your .CSV by clicking the '3 dot' icon.

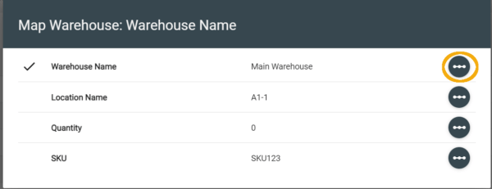
- Repeat the previous step to map Location Name, SKU, and Quantity.
- Map "Warehouse Name" to the corresponding heading from your .CSV by clicking the '3 dot' icon.
NOTE: If the intent is to create new locations, please utilize the Location drop down section and assign the Location Code to the Location Name (in the above screenshot, the location code in this case would be A1-1)
-
- When finished mapping all criteria, click the orange "Save Map" button
 .
. - This saves the custom mapping. To finish this step in the process and use the newly created map, click the checkmark to move onto the preview screen.

- When finished mapping all criteria, click the orange "Save Map" button
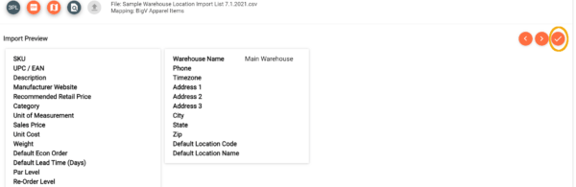
- From this preview screen, review to make sure your information was mapped correctly and values were applied to the desired fields. You can use the orange left and right arrows to navigate between each record. When satisfied that everything is correct, hit the orange checkmark button. Now you are ready to finalize the import.
- Click the green upload arrow button to initiate the final upload. Upload time will depend on the amount of information being uploaded.
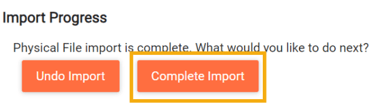
- Lastly, hit the orange "Complete Import" button to finalize the upload.