Receive With Purchase Order (PO)
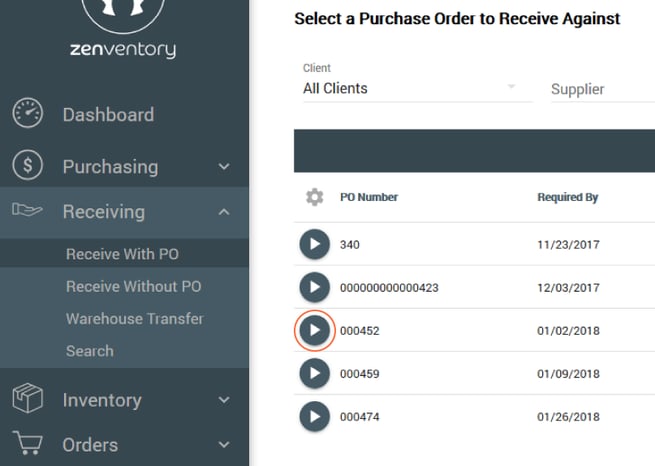
Purchase orders that are due and can be received in will appear initially on the Receiving tab.
- Click “Select this PO” icon to the left of the selected PO.
- Review the order receipt, adding notes if needed.
- Select receiving location for the warehouse.
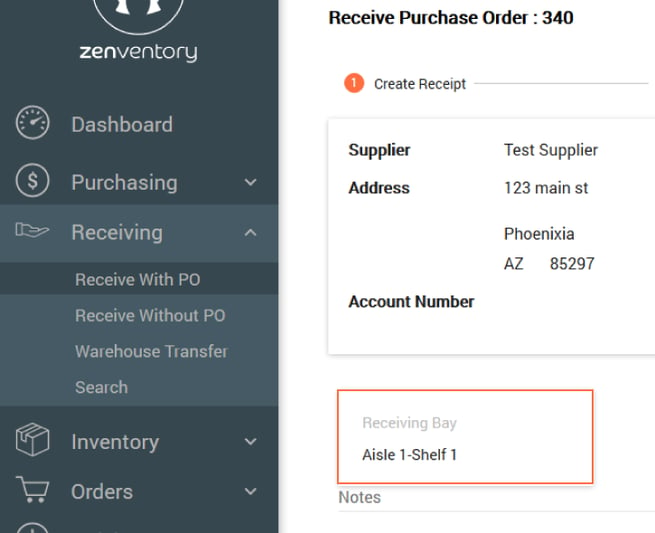
- Click "Next" to move to confirmation step.
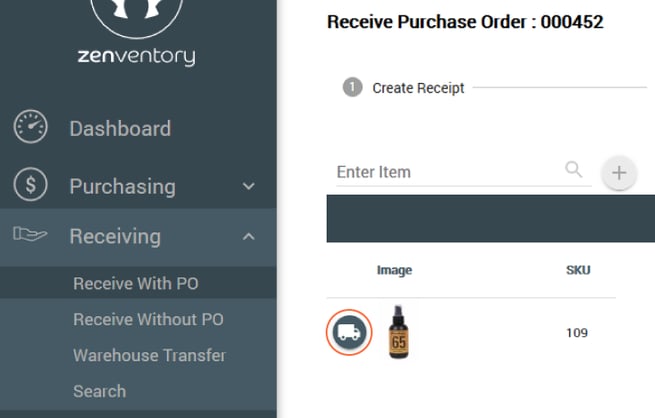
- Click the "Truck" icon left of the item to review quantity expected for each item.
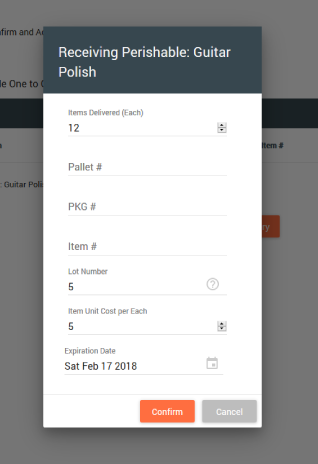
- Enter in needed fields for item detail pop-up:
-
- Only field that is required is “Items Delivered”.
- Unit cost will populate with info from order/item(s).
- Will default to item quantity on order.
- Enter correct number of items delivered and click "Confirm".
- To review delivered item quantities, or to remove items, select “Click to Review" icon to the right of the item.
- To print a label for an item, click the "Barcode" icon to the right of the item.
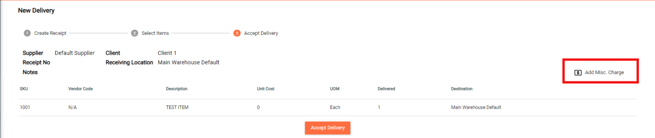
- 3PL only: if you need to add a miscellaneous receiving charge then hit the "Add Misc. Charge" button on the Accept Delivery screen.

- Select “Accept Delivery” to finalize.
- Select OK, and the PDF receipt will generate.
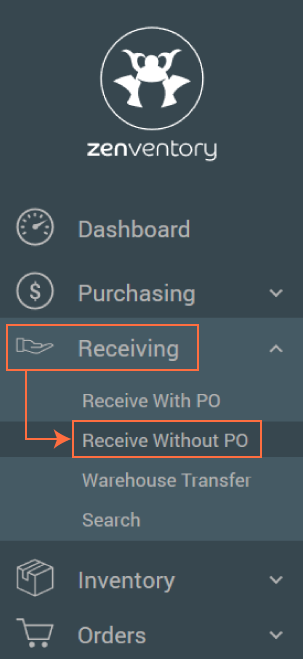
Receiving Without a PO
- In the Receiving tab, select "Receive Without PO".
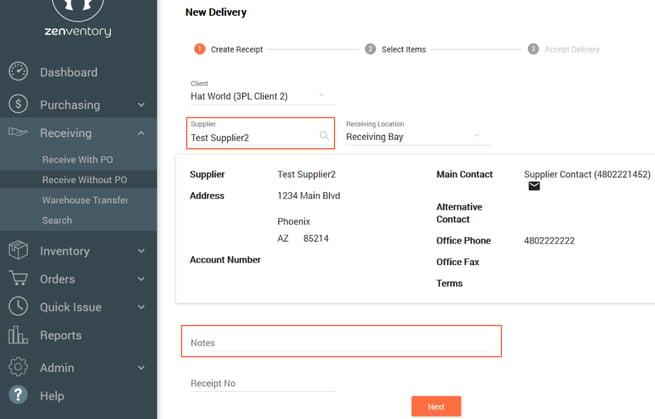
- Enter in Receipt number, if needed.
- Search for "Supplier Name". (NOTE: A supplier must be selected even if receiving with a PO) Add any notes and click "Next".
- Select "Add New Item".
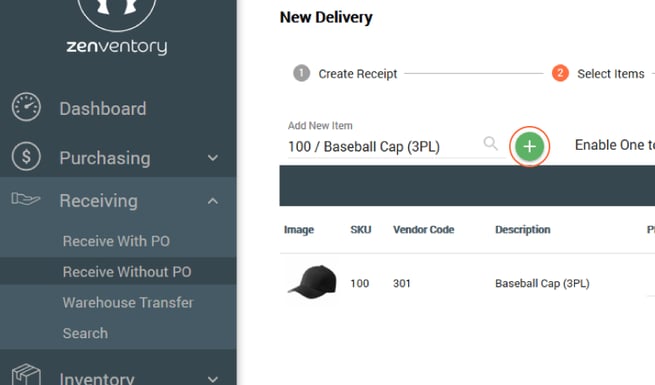
- Begin typing item SKU to search and select.
- Enter in other item fields if needed, but delivered quantity is required.
- Click "Next" to move to confirmation step.
- 3PL only: if you need to add a miscellaneous receiving charge then hit the "Add Misc. Charge" button on the Accept Delivery screen.
- Review and select "Accept Delivery" to complete receiving.

- Select OK in pop-up message and PDF receipt will generate.
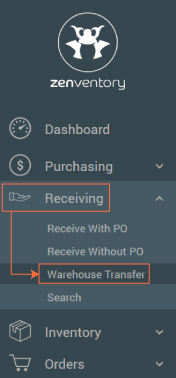
Receiving a Warehouse Transfer
- Navigate to the Receiving Tab and select "Warehouse Transfers".
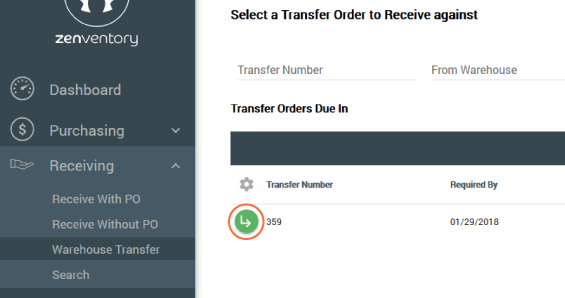
- Select icon for “Select this Item” on left to open Warehouse Transfer order.
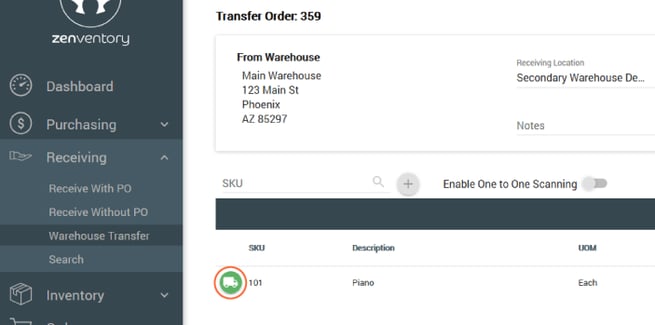
- Add notes if needed, and select receiving location for Warehouse.
- Select “Click to receive this Item” icon on left.
- Enter the correct number of items delivered and click "Confirm".

- Defaulted to item quantity placed on order.
- If a greater or lesser number than the ordered quantity, a pop-up will alert you.
- Review and select "Accept Receipt".
- Select OK in pop-up message to finalize.