![Untitled design (24)-1.png]](https://help.zenventory.com/hs-fs/hubfs/Logos/Untitled%20design%20(24)-1.png?width=60&height=60&name=Untitled%20design%20(24)-1.png)
THINGS TO KNOW:
-
In order to create a return, at least 1 item has to have shipped on the outbound customer order you are creating a return for.
- Zenventory does not communicate returns with any connected marketplaces. Refunds of original payment are handled in the respective marketplace while Zenventory returns control the physical returning of the items (s) to the warehouse (s).
Managing customer returns in Zenventory involves a 2-step process: Initiating the RMA and then receiving the return.
INITIATE THE RMA (Create the Return)
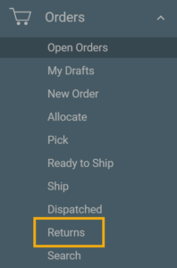
- To initiate a return or see returns in progress, use the left-hand navigation panel and select Orders -> Returns.
- In the top section of the page, you can initiate a return for a particular order number by typing in the order number and pressing the "+" button to the right of the field.
- A pop-up window will appear showing the contents of the order and allowing you to set quantities to be returned of each line item. You will also be able to choose between refunding or replacing the item upon receipt of the return. Choosing replace will automatically create a new outbound customer order for the items being returned. Choosing refund just creates the return. Lastly, you can choose to generate a Return Shipping label. Press the "Create Return button after making your selections.
.png?width=670&height=495&name=Screenshot%20(1652).png)
- If you chose to "Create New Return Shipping Label" in step #3, then proceed to step #5 below. Otherwise, your return has now been created and will appear on the "Expected" tab, awaiting to be received.
- NOTE: If you would like the customer to automatically receive a clickable link to access and download the return label, then you need to set up a Communication Rule for the "Return Label Created" trigger. Click here to learn how to setup a Communication Rule for email alerts.Choose the Return Shipping Service from the dropdown menu titled "Service". Hit the "Create Label" button. A new shipping label will then be generated.
INITIATE THE RMA (Create the Return)
- From the Orders ->Returns page, press the play button to the left of your order number you wish to return. If you have a sizable list of returns to filter through, you can use the search fields at the top to narrow down your results.
- After pressing the play button, you'll be able to select which specific location you are receiving these items into within your warehouse, as well as the quantity and condition you find the items in.
- 3PL added functionality: When receiving a return for a client, the "add miscellaneous charge" button will be present on this screen.
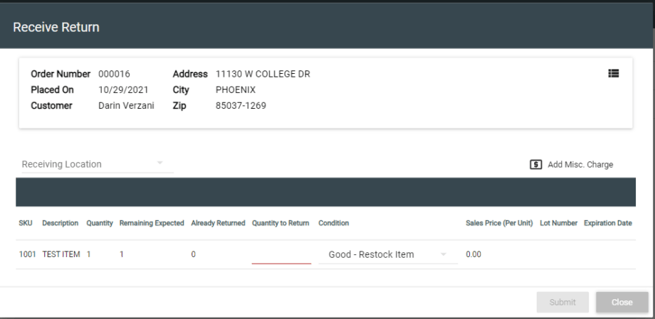
- After filling out all required fields, pressing submit will finish processing your return and will return the inventory to stock (or not) depending on the condition you noted on the previous screen.
- Your return is complete!